Essential Tips for Using FEP Heat Shrink Tubing

FEP heat-shrink tubing plays a vital role in ensuring durability and reliability in various applications. It provides essential insulation, protection, and sealing, making it indispensable for safeguarding components in harsh environments. Whether you are protecting wiring from moisture or repairing wiring exposed to chemicals, the right FEP heat shrink tube ensures a secure fit and long-lasting performance. Its flexibility and resistance to extreme temperatures make it a dependable choice for demanding tasks. Proper selection, preparation, and installation of heat shrink tubing are crucial to achieving optimal results and maintaining the integrity of your projects.
Selecting the Right FEP Heat Shrink Tube
Choosing the right fep heat shrink tube is essential for ensuring optimal performance and durability in your applications. By understanding key factors like shrink ratios, diameter selection, and material compatibility, you can make informed decisions that enhance the effectiveness of your projects.
Understanding Shrink Ratios
Shrink ratios determine how much the tubing will reduce in size when heat is applied. For example, a 1.3:1 shrink ratio means the tubing will shrink to 77% of its original diameter. This ratio works well for applications requiring a smooth and even surface, such as encapsulating catheters or surgical tools. However, for irregular surfaces or components with varying diameters, a higher shrink ratio may be more suitable to ensure proper sealing and coverage.
"To achieve the best results, always allow for at least 20% recovery of the tubing. This prevents splitting and ensures a secure fit."
When selecting a shrink ratio, consider the shape and size of the object you are covering. A proper fit not only enhances insulation but also maintains the structural integrity of the tubing.
Choosing the Correct Diameter
Selecting the correct diameter is crucial for achieving a snug fit. Measure the largest diameter of the object you want to cover and choose tubing with an expanded diameter slightly larger than this measurement. After shrinking, the tubing should tightly conform to the object without gaps or excessive stretching.
Avoid forcing the tubing over an object by stretching it. This can compromise its insulating properties and durability. Instead, ensure the tubing's dimensions align with your specific requirements. For applications involving wires or cables, adhesive-lined heat shrink tubing can provide additional sealing and protection against moisture.
Material Compatibility and Application Considerations
The material properties of fep heat-shrink tubing make it highly versatile. Its chemical resistance, high-temperature tolerance, and flexibility allow it to perform effectively in demanding environments. For instance, fep heat shrink tubing operates within a temperature range of -200°C to 200°C, making it suitable for both extreme cold and heat.
When selecting tubing, consider the environment and the materials it will come into contact with. For medical applications, fep tubing offers biocompatibility and durability, making it ideal for use in catheters, endoscopes, and surgical instruments. In industrial settings, it provides reliable insulation for electrical components and protection against harsh chemicals.
Additionally, think about the specific needs of your project. If you require abrasion resistance or mechanical protection, fep heat-shrink tubing is an excellent choice. For applications requiring enhanced sealing, adhesive-lined heat shrink tubing can offer added benefits.
By carefully evaluating shrink ratios, diameter, and material compatibility, you can select the most suitable shrink tubing for your needs. This ensures not only a secure fit but also long-lasting performance in any application.
Preparing for Installing Heat Shrink Tubing
Proper preparation ensures a smooth and effective installation of FEP heat shrink tubing. By gathering the right tools and following safety measures, you can achieve professional results while avoiding common pitfalls.
Tools and Equipment Needed
Using the correct tools for installing heat shrink tubing is essential for precision and efficiency. Before starting, gather the following items:
Heat gun: A heat gun provides controlled and even heating, which is crucial for shrinking the tubing without damaging it.
Cutting tools: Use sharp scissors or a utility knife to cut the tubing to the desired length. Dull tools can create uneven edges, leading to improper sealing.
Measuring tape: Accurate measurements ensure the tubing fits snugly over the object.
Protective gloves: Heat-resistant gloves protect your hands from burns during the installation process.
Tweezers or pliers: These tools help position the tubing on small or delicate components.
"To ensure successful use of heat shrink tubing, it’s essential to understand the specific application, take accurate measurements, and follow proper installation techniques."
Having these tools ready before you begin saves time and helps you avoid mistakes during the process.
Preheating and Safety Tips
Preheating the tubing and following safety guidelines are critical steps in the installation process. FEP heat shrink tubing generally starts undergoing noticeable shrinking at 110°C, but a higher temperature around 210°C is needed to fully release the shrink force stored in FEP heat shrink tubing. Therefore, applying heat correctly is vital for achieving a secure fit without damaging the encapsulated material.
Preheat the tubing: Before applying heat directly to the tubing, warm the surrounding area slightly. This reduces the risk of uneven shrinking and minimizes longitudinal shrinkage.
Apply heat evenly: Use a heat gun to distribute heat uniformly across the tubing. Start at one end and work your way to the other. Avoid focusing heat on a single spot, as this can cause wrinkles or damage.
Maintain a safe distance: Keep the heat gun at least a few inches away from the tubing. This prevents overheating and ensures controlled shrinking.
Monitor the recovery temperature: Ensure the tubing reaches its recovery temperature to achieve a tight and secure fit. Insufficient heat may leave gaps, while excessive heat can compromise the tubing's integrity.
Safety should always be a priority. Wear protective gloves to shield your hands from heat, and work in a well-ventilated area to avoid inhaling fumes. By following these tips, you can install the tubing effectively while maintaining a safe environment.
How to Install Heat Shrink Tubing: Step-by-Step Guide
Installing heat shrink tubing requires precision and attention to detail. By following a structured process, you can ensure a secure fit and optimal performance. This step-by-step guide will walk you through the process of preparing, applying, and checking your shrink tubing.
Preparing the Tubing
Preparation is the foundation of a successful installation. Start by selecting the appropriate size of fep heat-shrink tubing. The tubing should have an expanded diameter slightly larger than the object you are covering. Avoid choosing tubing that is too large, as it may not shrink tightly enough to provide proper insulation.
Measure and cut: Use a measuring tape to determine the length of tubing required. Cut the tubing to size using sharp scissors or a utility knife. Ensure the edges are clean and even to avoid gaps during shrinking.
Position the tubing: Slide the tubing over the object, ensuring it covers the area that needs protection. For wires or connectors, center the tubing to provide even coverage on both sides.
Inspect the setup: Double-check the placement of the tubing. If you are using clear tubing, it allows you to inspect the connections after shrinking, which is especially useful for evaluating solder joints.
"Choosing tubing smaller than the smallest component ensures a snug fit after shrinking."
Proper preparation minimizes errors and sets the stage for a smooth installation process.
Applying Heat
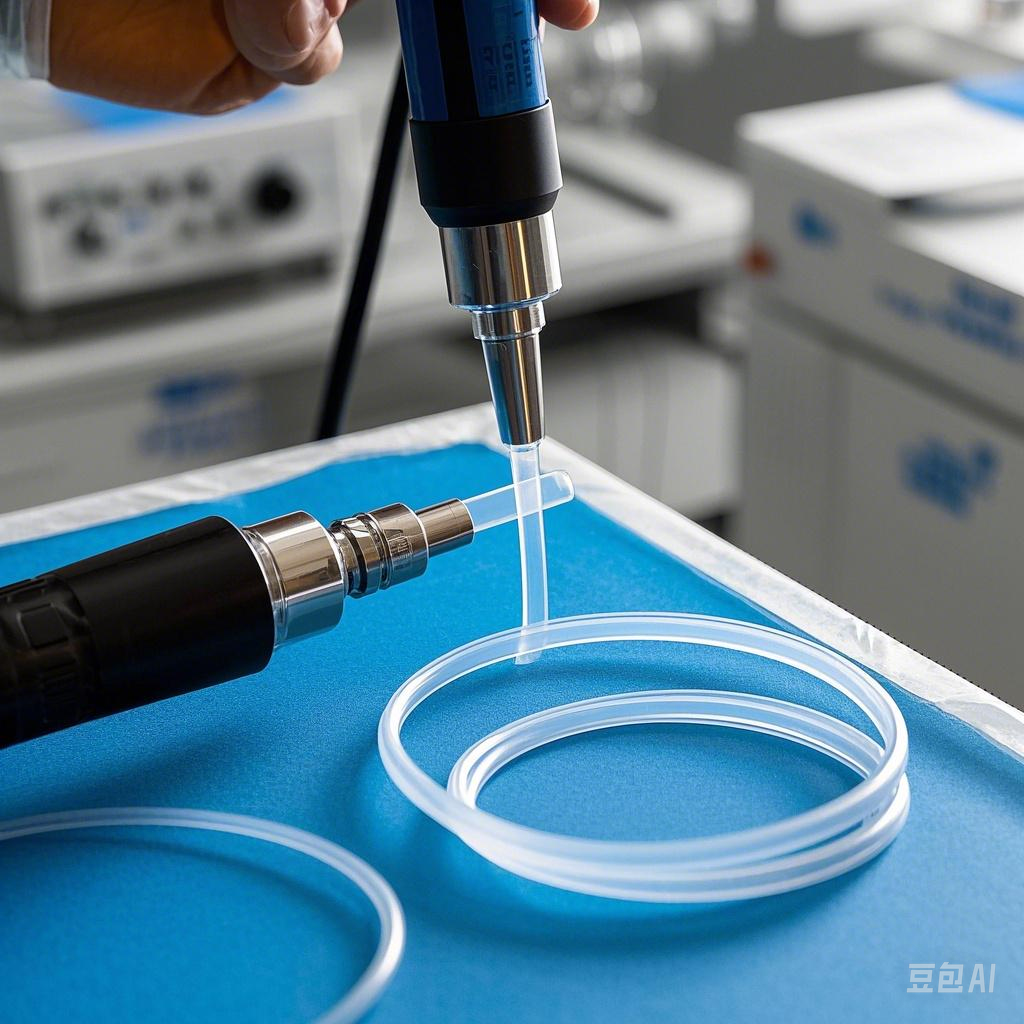
Applying heat evenly is critical to achieving a secure and professional finish. A heat gun is the most effective tool for this step.
Start at one end: Begin heating the tubing at one end. Hold the heat gun a few inches away from the surface to prevent overheating. Move the gun in a sweeping motion to distribute heat evenly.
Work gradually: Slowly move along the length of the tubing. Allow the material to shrink and conform to the object before moving further. Avoid focusing heat on one spot for too long, as this can cause wrinkles or damage.
Monitor the process: Watch for the tubing to reach its recovery temperature, approximately 110°C for fep heat-shrink tubing. The tubing should shrink tightly around the object without gaps or bubbles.
Even heating ensures the tubing adheres properly and maintains its insulating properties. Take your time to avoid mistakes during this step.
Post-Installation Checks
After shrinking the tubing, inspect your work to confirm a successful installation. Post-installation checks help identify any issues that may compromise the tubing's performance.
Check for gaps: Examine the tubing for any gaps or areas where it has not fully adhered. Reapply heat if necessary to correct these issues.
Inspect for damage: Look for signs of overheating, such as discoloration or cracks. Damaged tubing should be replaced to maintain insulation and protection.
Test the fit: Gently tug on the tubing to ensure it is securely in place. Properly installed tubing should not move or slide.
"Post-installation checks ensure the tubing provides reliable insulation and protection for your components."
By completing these checks, you can confirm that your heat shrink tubing is ready for use and will perform effectively in its application.
Following this guide on how to install heat shrink tubing ensures a professional and durable result. With careful preparation, precise heating, and thorough inspection, you can achieve optimal performance from your shrink tubing.
Tips and Tricks to Avoid Common Mistakes
When working with fep heat-shrink tubing, avoiding common mistakes ensures a smooth process and optimal results. By following these tips and tricks, you can enhance your installation experience and achieve professional-quality outcomes.
Errors During Selection
Selecting the wrong tubing is one of the most frequent errors. To avoid this, focus on these tips:
Choose the correct diameter: Always select tubing with an expanded diameter slightly larger than the largest part of the object you are covering. For example, if you are insulating a wire, measure its diameter and pick tubing that shrinks snugly around it. Tubing smaller than the smallest component ensures a tight fit after shrinking.
Understand shrink ratios: The most common ratio is 2:1, meaning the tubing shrinks to half its original size. For irregular shapes, consider higher ratios like 3:1 to ensure proper coverage and sealing.
Match material compatibility: Ensure the tubing material suits your application. For instance, fep heat-shrink tubing offers excellent chemical resistance and operates in extreme temperatures, making it ideal for demanding environments.
"Correct sizing and material selection are the foundation of successful heat shrink tubing applications."
By following these guidelines, you can avoid selection errors and ensure the tubing meets your project’s requirements.
Mistakes During Installation
Even with the right tubing, improper installation can lead to poor results. Use these tips and tricks to avoid common pitfalls:
Avoid uneven heating: Uneven heat application can cause wrinkles or incomplete shrinking. Use a heat gun and move it in a sweeping motion to distribute heat evenly.
Prevent overheating: Excessive heat can damage the tubing or the components underneath. Maintain a safe distance between the heat gun and the tubing, and monitor the process closely.
Minimize longitudinal shrinkage: Start heating at the ends of the tubing first. This ensures the tubing grips the object securely and reduces the risk of excessive lengthwise shrinkage.
Use the right tools: Gather essential tools like a heat gun, sharp scissors, and a measuring tape. Proper tools make the process efficient and reduce errors.
"Preparation and precision during installation are key to achieving a secure and professional finish."
By following these tips, you can avoid installation mistakes and ensure the tubing performs as intended.
Troubleshooting Tips
If issues arise during or after installation, these tricks can help you troubleshoot effectively:
Inspect for gaps: After shrinking, check for any gaps or areas where the tubing hasn’t adhered properly. Reapply heat to correct these spots.
Check for damage: Look for signs of overheating, such as discoloration or cracks. Replace damaged tubing to maintain insulation and protection.
Test the fit: Gently tug on the tubing to ensure it is secure. If it moves or slides, reheat the area to improve adhesion.
Address uneven shrinking: If the tubing appears wrinkled, apply heat evenly across the surface to smooth it out.
"Troubleshooting ensures your heat shrink tubing provides reliable insulation and long-lasting protection."
By using these tips and tricks, you can resolve common issues and maintain the integrity of your shrink tubing installations.
Mastering these usage tips will help you avoid errors, streamline the installation process, and achieve durable results with fep heat-shrink tubing. Whether you are a beginner or an experienced user, these tips and tricks will enhance your skills and confidence.
Selecting the right FEP heat shrink tube, preparing thoroughly, and following proper installation techniques are essential for achieving reliable results. These steps ensure that your components remain protected, organized, and functional in demanding environments. By applying the tips and tricks shared, you can avoid common mistakes and enhance the durability of your projects. For specific applications, consult product guides or seek advice from professionals to ensure the best outcomes. Mastering these practices will help you make the most of FEP heat-shrink tubing in any project.
FAQ
What are FEP and PTFE heat shrink tubing designed for?
FEP and PTFE heat shrink tubing are designed for high-temperature and aggressive environments. These materials offer excellent chemical resistance, superior insulation, and non-stick properties. You can use them in applications where durability and reliability are critical, such as medical devices, aerospace components, and industrial machinery.
Key takeaway: FEP and PTFE tubing excel in demanding conditions, making them ideal for protecting sensitive components.
How do I choose the correct size of heat shrink tubing?
To select the right size, measure the largest diameter of the object you want to cover. Choose tubing with an expanded diameter slightly larger than this measurement. After shrinking, the tubing should fit snugly without gaps or excessive stretching. Always allow for at least 20% recovery to prevent splitting and ensure a secure fit.
Pro tip: Tubing smaller than the smallest component ensures a tight and reliable fit after shrinking.
What is the difference between shrink ratios like 2:1 and 3:1?
Shrink ratios indicate how much the tubing will reduce in size when heat is applied. A 2:1 ratio means the tubing shrinks to half its original diameter, while a 3:1 ratio shrinks to one-third. Use 2:1 for uniform objects and 3:1 for irregular shapes or varying diameters to ensure proper coverage and sealing.
Remember: Higher shrink ratios provide more flexibility for complex shapes.
Can FEP heat shrink tubing withstand extreme temperatures?
Yes, FEP heat shrink tubing operates effectively in a wide temperature range, from -200°C to 200°C. This makes it suitable for both extremely cold and hot environments. Its high-temperature tolerance ensures reliable performance in demanding applications.
Fun fact: FEP tubing’s versatility makes it a popular choice for industries like electronics and healthcare.
What tools do I need to install heat shrink tubing?
You’ll need a heat gun for even heating, sharp scissors or a utility knife for cutting, and a measuring tape for accurate sizing. Heat-resistant gloves protect your hands, while tweezers or pliers help position the tubing on small components.
Tip: Using the right tools ensures precision and reduces installation errors.
How do I avoid wrinkles or uneven shrinking during installation?
To prevent wrinkles, apply heat evenly across the tubing using a heat gun. Start at one end and move gradually to the other. Avoid focusing heat on a single spot, as this can cause uneven shrinking or damage.
Advice: Keep the heat gun a few inches away from the tubing for controlled and uniform heating.
Is FEP heat shrink tubing resistant to chemicals?
Yes, FEP heat shrink tubing offers excellent chemical resistance. It protects components from exposure to harsh chemicals, oils, and solvents. This makes it ideal for industrial and medical applications where chemical exposure is common.
Did you know? FEP tubing is often used in environments with aggressive chemical conditions due to its durability.
Can I use FEP heat shrink tubing for electrical insulation?
Absolutely. FEP heat shrink tubing provides reliable electrical insulation. It safeguards wires and connectors from moisture, abrasion, and environmental damage. Its insulating properties make it a dependable choice for electrical and electronic applications.
Quick tip: For added protection, consider adhesive-lined tubing to seal out moisture.
How do I troubleshoot issues with heat shrink tubing?
If the tubing doesn’t adhere properly, reapply heat evenly to correct gaps. Inspect for signs of overheating, such as discoloration or cracks, and replace damaged tubing. Ensure the tubing fits securely by gently tugging on it after installation.
Troubleshooting tip: Address uneven shrinking by reheating the surface to smooth out wrinkles.
Why is FEP heat shrink tubing preferred for medical applications?
FEP tubing is biocompatible, durable, and resistant to chemicals, making it ideal for medical devices like catheters and surgical instruments. Its non-stick properties also allow for easy cleaning and sterilization.
Insight: FEP tubing’s unique properties ensure safety and reliability in healthcare settings.
See Also
The Importance of Ultra-Thin PET Tubing in Healthcare
Selecting the Ideal PTFE Etched Liner for Your Needs
Top Five Advantages of Using Medical Grade PTFE Liners

© Copyright 2024 My First Blog - All Rights Reserved.