Testing the Tensile Strength of Nitinol Tubes Using ASTM F2516


ASTM F2516 provides a reliable method to test Nitinol Tube Tensile Strength. When testing nitinol tubing, it is essential to prepare each sample carefully and set up the testing equipment precisely. Properly measuring Nitinol Tube Tensile Strength helps prevent errors caused by factors such as nonmetallic inclusions, voids, or variations in the nitinol tubing. Maintaining a consistent temperature is crucial since nitinol's tensile strength can vary with heat. This testing method enables engineers to obtain accurate data on Nitinol Tube Tensile Strength, ensuring that the results truly reflect the actual strength of each nitinol tube.
Key Takeaways
Get nitinol tubing samples by picking certified tubes. Cut them with special tools. Measure their size very carefully. This helps you get good test results.
Use the right machines and grips for testing. Keep the temperature at body heat, which is 37°C. Set the strain rate correctly. This makes the tensile strength test fair and reliable.
Gather lots of data during the tests. Write down the force, how much the tube stretches, and the stress-strain curves. This helps you learn about nitinol tubing’s superelasticity and strength.
Always follow the same testing steps. Write down every detail. This makes sure the results can be trusted and repeated. It also helps keep medical devices safe.
Look at important results like plateau strength and residual elongation. This checks if the tubing can stretch and go back to its shape. It shows if the tubing works well in real medical situations.
ASTM F2516 Overview
Purpose of the Standard
ASTM F2516 gives a simple way to test how strong nitinol tubing is when pulled. This standard explains how to check things like upper and lower plateau strength, residual elongation, and ultimate tensile strength. You use this standard to make sure nitinol tubing is good enough for medical use. ASTM F2516 uses SI units and cares about safety, but you still need to follow your lab’s safety rules.
If you use ASTM F2516, you get good data about nitinol tube tensile strength. The standard shows you each step in the testing. You learn how to set the strain rate and how to collect data that shows how nitinol tubing acts. The results help you know if your nitinol tubing is strong enough for what you need. You also use these results for more tests, like fatigue testing or computer modeling.
Tip: Always check your tools and follow ASTM F2516 steps. This helps you avoid mistakes and keeps your results the same.
Why Use for Nitinol Tubing
People pick ASTM F2516 for nitinol tubing because this material is special. Nitinol tubing can stretch and return to shape, resists breaking after many bends, and stays strong. These things matter for medical tools, which must bend and not break. The standard helps you see how nitinol tubing handles being bent and stretched many times.
Nitinol tubing can last through millions of bends without getting weak.
The standard checks tensile strength, strain recovery, and fatigue resistance.
You can see how making and structure change nitinol tubing strength.
Testing with ASTM F2516 shows if nitinol tubing is safe for medical devices.
Nitinol tubing is also safe for the body and does not rust, so it works well for implants. When you test tensile strength with ASTM F2516, you make sure nitinol tubing will work in real life. This standard is the best because it fits what nitinol tubing needs for medical use.
Nitinol Tubing: Specimen Preparation
Tube Selection
First, pick nitinol tubing that fits your project. For medical use, choose tubing with the right size and tensile properties. Make sure the nitinol tubing comes from a trusted supplier. Good nitinol tubing keeps its shape memory effect and superelastic properties. These features are important for devices that bend and return to shape. Look for tubing with certified properties if you use it for medical things. The right nitinol tubing helps you get true tensile results. It also shows the real properties of the material.
Cutting and Handling
Cutting nitinol tubing needs care and special tools. Use tools like ultra-short pulsed lasers to stop heat damage. This keeps the tensile properties and shape memory effect safe. Factories use water-cooled clamps or vacuum holders to hold thin tubing steady. Clean the tubing with ultrasonic cleaners and deionized water before cutting. This step removes dirt that could hurt the cut or the tensile properties. Always wear gloves when you touch nitinol tubing. Store it in sealed containers to stop scratches. This keeps the tubing safe for medical use. After cutting, you can use electropolishing to smooth the surface and remove burrs. This makes the tubing better and safer for medical use.
Tip: Train everyone who cuts nitinol tubing. Good training keeps the tubing’s tensile properties and shape memory effect safe.
Measuring Dimensions
You must measure nitinol tubing carefully before testing tensile strength. Use laser micrometers or measuring machines for best results. Measure the outer and inner diameters of the tubing. Check the wall thickness because small changes matter. Always use the same way to measure each time. This keeps your tensile results correct and repeatable. For medical use, you must meet strict standards. Batch testing and quality checks help make sure every piece is safe. Mark the gauge length clearly on each specimen. This helps you measure tensile elongation and other properties during the test.
Equipment and Setup
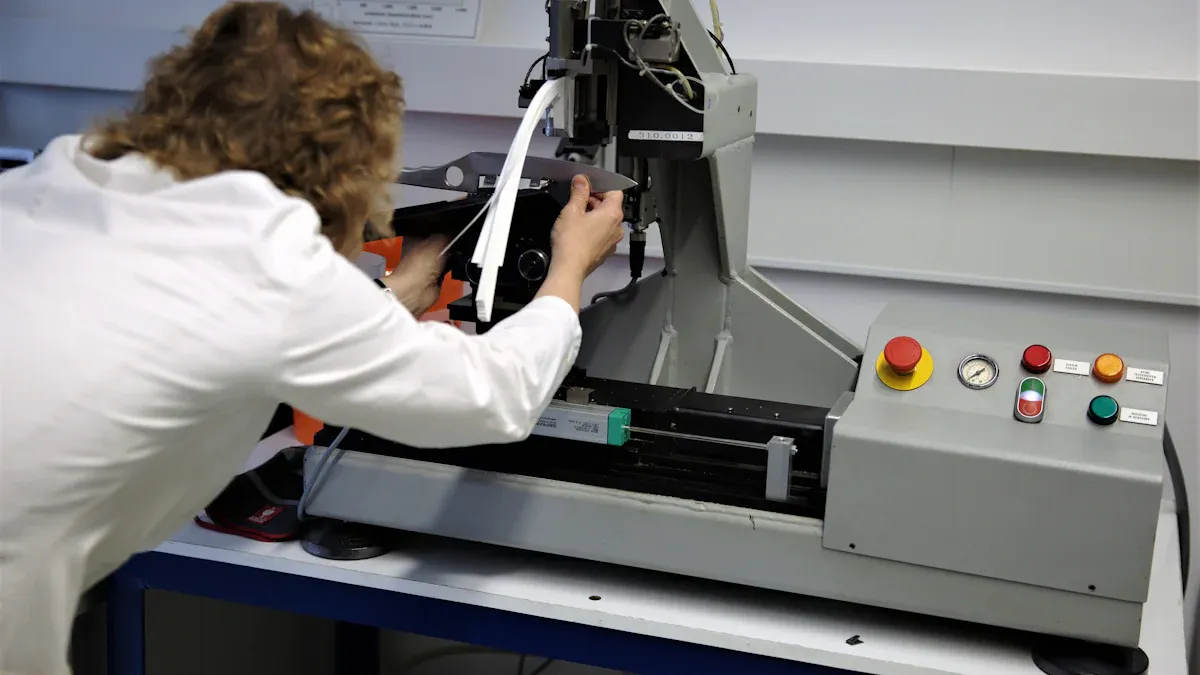
Required Equipment
You need special tools to test nitinol tubing for tensile strength. First, use a tensile testing machine that pulls the nitinol tubing until it breaks. This machine must handle how much nitinol can stretch before breaking. A testing controller moves the crosshead and records load and stretch data. Most labs use load cells between 1 kN and 5 kN. The 5 kN load cell is common for nitinol tubing. You also need grips to hold the nitinol tubing tight. Wedge grips are good for thin samples. Pneumatic cord and yarn grips work for small nitinol tubing. For bigger tubes, use pneumatic side action grips with rough faces. These grips keep the tube from slipping. Extensometers can measure how much the nitinol tubing stretches during the test.
Tip: Always check your tools before you start a test. This helps you get the right results and keeps your nitinol tubing safe.
Temperature Control
Keeping the right temperature is very important when testing nitinol tubing. Nitinol acts differently when the temperature changes. You need a temperature chamber to keep the nitinol tubing at the right heat during the test. Some labs use digital image tools with temperature chambers. These tools help you see how nitinol tubing acts in different conditions. Keeping the temperature steady helps you see the real performance of the nitinol tubing. This step makes sure your test results match what happens in real life.
Gripping and Mounting
Holding nitinol tubing the right way is important for good tests. If you grip the nitinol tubing too hard, it can get damaged. If you grip it too softly, it might slip during the test. Use pneumatic or knurled grips to hold the nitinol tubing tight. Make sure the grips fit the size of your nitinol tubing. Always put the tubing straight in the testing machine. This helps you measure the true performance of the nitinol tubing. Good gripping and mounting stop mistakes and give you the same results each time. You can use a table to check your setup:
Step | What to Check |
|---|---|
Grips | Fit the nitinol tubing size |
Mounting | Tubing is straight |
Load Cell | Matches expected performance |
Temperature Chamber | Set to correct temperature |
Note: Setting up carefully helps you get the best data from your nitinol tubing.
Nitinol Tube Tensile Strength Test

Test Procedure
First, get your equipment ready for the test. Put the nitinol tubing in the grips of the tensile testing machine. Make sure the tubing is straight and held tight. Set the temperature chamber to 37°C to match body heat. This helps you see how the nitinol tubing acts in real life.
Next, set the strain rate on the machine. ASTM F2516 says to use a strain rate of 0.5 mm/min. This rate gives results that match how nitinol tubing works in medical tools. Start the test by pulling the nitinol tubing slowly. Watch the load cell and extensometer as the tubing stretches. The machine records the force and how much the tubing stretches.
Keep pulling until the nitinol tubing breaks. The machine shows the tensile strength, which is the breaking point. You will also see the superelasticity as the tubing stretches and goes back to shape before it breaks. This test helps you find the true properties of the nitinol tubing.
Tip: Always check your machine settings before each test. This helps you get the right tensile strength data for every piece of nitinol tubing.
Data Collection
During the test, you collect important data about the nitinol tubing. The machine records the force needed to stretch the tubing and how far it stretches. You use this data to make a stress-strain curve. This curve shows how the nitinol tubing reacts to force and how much it can stretch before breaking.
Look for key points on the curve. The plateau region shows the superelasticity of the nitinol tubing. Here, the tubing stretches a lot with only a small increase in force. The ultimate tensile strength is the highest point on the curve. This value tells you the maximum strength of the nitinol tubing. You also measure the residual elongation, which shows how much the tubing stays stretched after the test.
Write down all measurements carefully. Record the gauge length, wall thickness, and other properties before and after the test. This helps you compare samples and see if the nitinol tubing meets your needs. Good data collection gives you a clear picture of the tensile strength and superelasticity properties.
Data Point | What It Shows |
|---|---|
Plateau Strength | Superelasticity region |
Ultimate Tensile Strength | Maximum force before breaking |
Residual Elongation | Permanent stretch after testing |
Stress-Strain Curve | Full behavior of nitinol tubing |
Note: Accurate data collection helps you understand the true properties and strength of your nitinol tubing.
Cyclic Loading (Optional)
Cyclic loading tests help you learn more about the superelasticity and fatigue properties of nitinol tubing. In these tests, you stretch and release the tubing many times. This shows how the nitinol tubing holds up when used over and over.
Follow these steps for cyclic loading:
Use strain control to find weak spots and measure fatigue life in nitinol tubing.
Try rotary bend tests in liquid at 37°C to match real-life conditions.
Watch the strain amplitude. Strains above 1.3% can lower the fatigue life of nitinol tubing.
Run high-cycle fatigue tests. Nitinol tubing can last up to 10 million cycles at low strain amplitudes.
Use ultrasound or X-ray imaging to check for early cracks during testing.
Make the surface smoother with electropolishing. This removes rough spots that can start cracks.
Control pre-strain during manufacturing to lower leftover stresses.
Use heat treatments, like heating at 900°C and aging at 450°C, to improve superelastic recovery and fatigue resistance.
Use computer modeling to find and fix stress points in the tubing.
Cyclic loading tests show that superelastic nitinol tubing can handle strains between 4% and 12% better than most metals. The fatigue life depends on the strain amplitude, surface quality, and microstructure. Smooth surfaces and good microstructure help keep the superelasticity and stop cracks. During these tests, you may see phase changes inside the nitinol tubing. These changes help the tubing recover its shape and keep its strength after many cycles.
Tip: Always check the surface and microstructure of your nitinol tubing before and after cyclic loading. This helps you keep the superelasticity and tensile strength high.
Key Measurements and Results
Plateau Strength
When you test nitinol tubing, you look for plateau strength on the stress-strain curve. Plateau strength is where the tubing stretches but the force does not go up much. You see this flat part after the first straight section of the curve. Plateau strength means the nitinol tubing is now superelastic. At this point, the tubing changes from austenite to martensite. This change gives nitinol tubing its superelasticity and lets it return to its shape.
To measure plateau strength, you pull the nitinol tubing and watch for the flat part of the curve. This area is important for medical devices. It shows the tubing can bend and stretch but still keep its shape. You want to see a clear plateau strength in your results. This means your nitinol tubing has good superelastic properties and will work well in real life.
Plateau strength proves superelasticity in nitinol tubing.
You need this result to check if the tubing is good for medical use.
The plateau region should be wide and flat for best results.
Note: Plateau strength is very important for quality control. It shows your nitinol tubing will work safely and reliably in devices that need to bend and go back to shape.
Residual Elongation
Residual elongation tells you how much the nitinol tubing stays stretched after you stop pulling. You find this by checking the difference in strain at 7 MPa between loading and unloading curves. You want this number to be very low. Low residual elongation means the nitinol tubing goes back to its original length after stretching. This shows strong superelasticity and good performance.
You use video or automatic extensometers to measure strain. These tools help you get the right numbers for residual elongation. For most superelastic nitinol tubing, you want less than 0.25% residual strain. This small number means the tubing does not stay stretched and keeps its shape memory effect.
Here is a table to help you see normal values:
Property | Typical Value for Superelastic Nitinol Tubing |
|---|---|
Residual Strain (%) | Less than 0.25% |
Loading Plateau | Varies by material condition |
Unloading Plateau | Varies by material condition |
Elongation at Failure | 6% minimum for as-drawn wires |
You want to see low residual elongation in your results. This means your nitinol tubing will keep working well, even after many times of stretching and relaxing.
Stress-Strain Curve
The stress-strain curve is the main way to see how nitinol tubing acts when pulled. This curve has three main parts:
Elastic Region: The curve starts with a straight line. Here, the nitinol tubing stretches a little and goes back to its shape when you stop pulling.
Plateau Region: After the straight part, the curve flattens. This is the plateau strength area. The tubing stretches more, but the force stays almost the same. This part shows the superelasticity and phase change inside the nitinol tubing.
Plastic Deformation: At the end, the curve goes up again. The tubing stretches until it breaks. This is where you find the ultimate tensile strength.
You should look for these key points on the curve:
Elastic limit: The end of the straight line. If you go past this, the tubing will not go back to its shape.
Plateau region: The flat part. This shows the tubing’s superelasticity.
Ultimate tensile strength: The highest point before the tubing breaks.
The superelasticity range is the difference between the plateau strain and the elastic limit. For example, if the elastic limit is 2% strain and the plateau strain is 6%, the superelastic range is 4%. This range tells you how much the nitinol tubing can stretch and still go back to its shape.
You should know that temperature changes can affect the plateau region. Higher temperatures may make the plateau smaller or even go away. Always test nitinol tubing at the right temperature for your use.
Nitinol tubing used in medical devices usually has an ultimate tensile strength between 500 MPa and 900 MPa. This high strength means the tubing can handle tough jobs in the body. The special shape memory effect and superelasticity make nitinol tubing better than many other metals for medical use.
Tip: Always check the stress-strain curve for a clear plateau and high ultimate tensile strength. This shows your nitinol tubing has the right performance for safe and reliable medical devices.
You can use the stress-strain curve to compare different batches of nitinol tubing. This helps you make sure every piece meets your quality standards. Good results on the curve mean your tubing will last longer and work better in real life.
Best Practices for Nitinol Testing
Accuracy and Repeatability
You want every nitinol tubing tensile strength test to give results you can trust. Always use tubing from the same batch and give them the same heat treatments. This helps stop changes in tensile strength from different chemicals or how the tubing was made. Cut your nitinol tubing samples with a laser to keep their structure the same. Handle each piece gently so you do not damage it. Damage can change tensile strength and make results less reliable.
Use the same test setup for every sample. Keep the temperature the same during each tensile strength test. Digital Image Correlation (DIC) lets you see how different parts of the nitinol tubing move when pulled. This tool helps you get more accurate and reliable tensile strength data. If you use the same steps each time, your results will be more alike and trustworthy.
Some mistakes are using tubing from different places, skipping heat treatment, or not keeping the temperature steady. These mistakes can change tensile strength results and make them less reliable. Always check your tools before each test. Engineers who follow these steps get better tensile strength data and more reliable nitinol tubing.
Tip: If you always prepare samples the same way and control test conditions, your tensile strength results will be more reliable.
Documentation
Good documentation shows your nitinol tubing tensile strength tests are reliable. Write down every step, from cleaning the sample to the last check. List all the details, like laser cutting, annealing, and surface finishing. Add both test and computer data to show how your nitinol tubing works.
Follow these steps for strong documentation:
Write detailed reports for each tensile strength test.
Describe the nitinol tubing, including batch numbers and process steps.
Add tables, pictures, and graphs to show tensile strength results.
Keep records from the raw material to the last check for tracking.
Use automatic data capture and laser marking to help with reliability and rules.
Get documents ready for audits and reviews.
If you keep clear records, engineers and inspectors can check the reliability and strength of your nitinol tubing. Good documentation helps keep patients safe and shows your tensile strength tests meet all standards.
If you follow ASTM F2516, you can test nitinol tubing well. This standard helps you check tensile strength, elongation, and shape memory. These things are very important for medical devices. You need to get the samples ready with care. Keep the temperature the same during testing. Read the data carefully so your results are always right.
To get the best results:
Pick certified nitinol tubing and watch every step closely.
Test each batch in approved labs and write down everything for tracking.
Update certifications and check quality often to keep tubing safe and strong.
Always pay close attention to details. This makes sure nitinol tubing meets tough medical rules and works well when used.
FAQ
What is the most important step in nitinol tube tensile testing?
You need to get your nitinol tubing ready first. Clean every piece before you test it. Measure and mark each sample so you know its size. Doing this helps you get results that are right every time.
Why does temperature matter during tensile testing?
Nitinol acts differently when it gets hotter or colder. You should test it at 37°C. This is the same as body temperature. Testing at this heat shows how the tubing will work inside people.
How do you avoid damaging nitinol tubing during testing?
Pick the right grips for the tubing. Hold the tubing gently so it does not get crushed. Do not let the tubing slip out of the grips. Careful handling keeps the tubing strong and safe.
What data should you record during a tensile test?
Always write down:
Gauge length
Wall thickness
Outer and inner diameters
Test temperature
Force and stretch data
Can you reuse nitinol tubing after a tensile test?
No, you cannot use the tubing again after testing. The test pulls and breaks the tubing. You must use a new piece for each test.
See Also
Evaluating Tensile Strength Differences Between Nitinol And Stainless Steel
The Effect Of Cyclic Life Testing On NiTi Tubing Durability
The Manufacturing Process Behind Nitinol Tubing For Medical Use
The Importance Of Nitinol Tubing In Cutting-Edge Medical Fields

© Copyright 2024 My First Blog - All Rights Reserved.