How to Achieve a Perfect Fit with -55°C to 135°C PET Heat Shrink Tubing

You can achieve a perfect fit with -55°C to 135°C PET heat shrink tubing by following a few simple steps. First, select the right pet tubing size for your project. Make sure you measure your components carefully because pet tubing must cover the area completely. Clean the surface before you slide the pet tubing over your wires or connectors. Use a heat gun to apply even heat so the pet heat shrink tubing shrinks smoothly. Good preparation and correct heating help your pet heat shrink tubing last, even in harsh conditions.
Key Takeaways
Measure your wires or parts with care. Pick PET tubing that is twice as wide before shrinking. This helps the tubing fit tightly.
Clean the surface well before you put the tubing on. This helps it stick better and keeps your wires safe.
Use a heat gun set between 75°C and 135°C. Move the heat gun around the tubing to shrink it evenly. Do not burn or melt the tubing.
Leave extra tubing on each end. Seal the ends well to keep out water, dust, and damage. This makes the protection last longer.
Do not make mistakes like using too much or too little heat. Make sure you pick the right size and prepare well. This will help you get a strong and safe fit.
Select PET Heat Shrink Tubing
Measure Components
First, measure the width of your wires or parts. You can use a ruler or caliper to be sure. Always check the widest spot that needs covering. Add about 1/4 inch to both ends for extra coverage. This extra part helps seal and protect the area. If you skip this, you might miss spots and have weak protection.
Tip: Check your measurements again before cutting the tubing. This stops you from wasting tubing and helps it fit well.
Choose Size and Shrink Ratio
Pick PET heat shrink tubing that is just big enough to go over your part. After you heat it, the tubing should hold tight with no spaces. PET tubing usually has a 2:1 shrink ratio. This means it gets half as wide when heated. For example, if your wire is 5 mm wide, pick tubing that is at least 10 mm wide before shrinking. This makes sure the tubing will fit snugly.
PET heat shrink tubing is strong and hard to tear. It keeps wires safe from cuts and scrapes.
The tubing also gives great electrical insulation and meets UL/CSA 224 and AMS-DTL-23053 standards.
PET tubing is used in many fields like cars, planes, and hospitals.
Check Temperature Rating
Check that the tubing works for the temperatures you need. For tough jobs, -55°C to 135°C PET heat shrink tubing works well. This range covers cold and hot places. PET tubing stands up to water, sunlight, and chemicals. It lasts a long time and keeps wires safe.
Note: PET heat shrink tubing is stronger and resists chemicals better than other types. That is why it is great for protecting wires in hard places.
Prepare for Installation
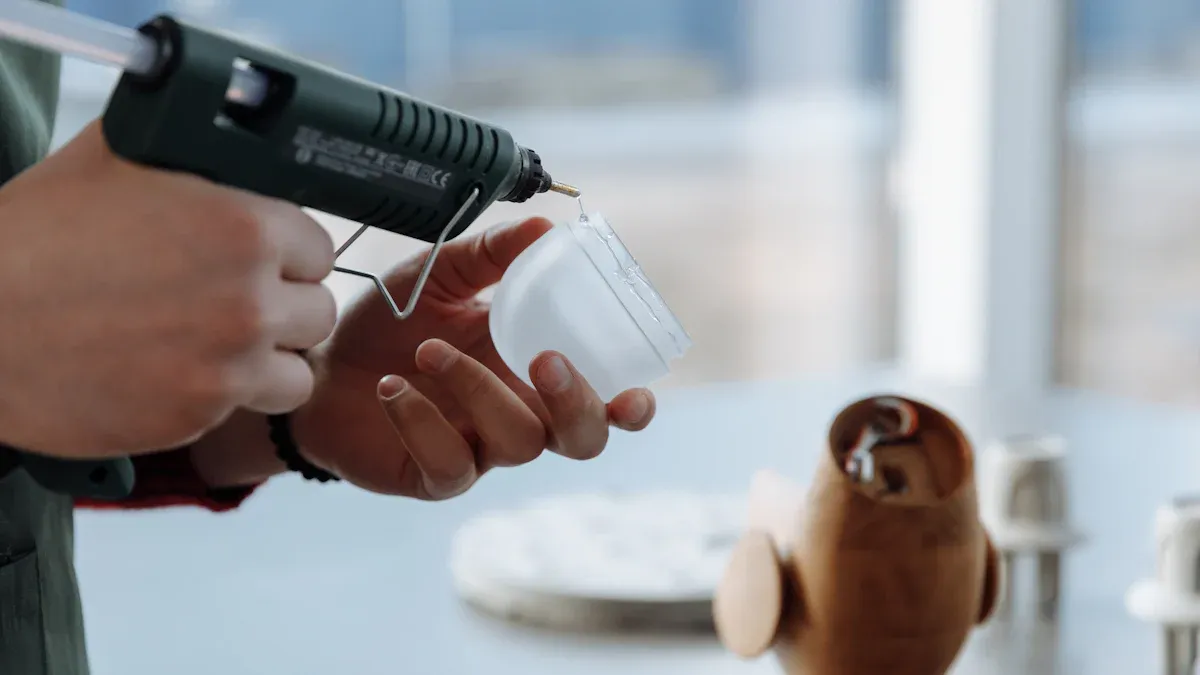
Gather Tools
You do not need special tools to install pet heat shrink tubing. Most people use a heat gun and a sharp cutting tool. You can also use scissors or a utility knife for cutting the tubing. Some users find that aluminum foil tabs help with bond testing, especially when you want to check the quality of your tubing preparation. A ruler or caliper helps you measure the pet tubing before you cut it. You may want gloves to protect your hands from heat.
Heat gun (for shrinking pet tubing)
Cutting tool (scissors or utility knife)
Ruler or caliper (for measuring pet tubing)
Aluminum foil tabs (optional, for bond testing)
Gloves (for safety)
Tip: You do not need expensive equipment. Simple tools work well for pet tubing preparation and installation.
Clean and Prep Surface
Before you slide pet tubing over your wires or connectors, clean the surface well. Dirt, grease, or dust can stop the tubing from sticking or shrinking the right way. Good preparation means you remove all foreign objects and make sure the pet tubing fits tight. Research shows that cleaning the surface helps the tubing grip better and keeps your wires safe. If you skip this step, you risk poor adhesion and weak protection.
Cleaning is a key part of tubing preparation. It helps you avoid problems like uneven shrinking or gaps in the pet tubing.
Cut Tubing
Cut the pet tubing to the right length before you start heating. Make sure you leave at least 1/4 inch extra on each end. This overlap helps seal the ends and gives better protection. When you cut the tubing, use a sharp tool so the edges stay smooth. Smooth edges help the pet tubing shrink evenly and cover your wires well. Many users say that non-crosslinked tubing, like some pet tubing, is easy to cut and fits snugly after shrinking. This makes tubing preparation simple and fast.
Measure twice before you cut the pet tubing.
Cut straight for a clean edge.
Check that the tubing covers the whole area you want to protect.
Note: Good tubing preparation helps the pet tubing bond well and last longer, even in tough conditions.
Install -55°C to 135°C PET Heat Shrink Tubing
Position Tubing
Start by sliding the PET heat shrink tubing over your wire or component. Make sure you center the tubing so it covers the area you want to protect. Leave about 1/4 inch of tubing on each end for a secure seal. If you use adhesive-lined PET heat shrink tubing, check that the adhesive lines up with the area you want to seal. Double-check the placement before you apply any heat. Once you start shrinking, you cannot move the tubing easily.
Tip: Hold the tubing steady with tweezers or pliers if the part is small. This helps you keep the tubing in the right spot.
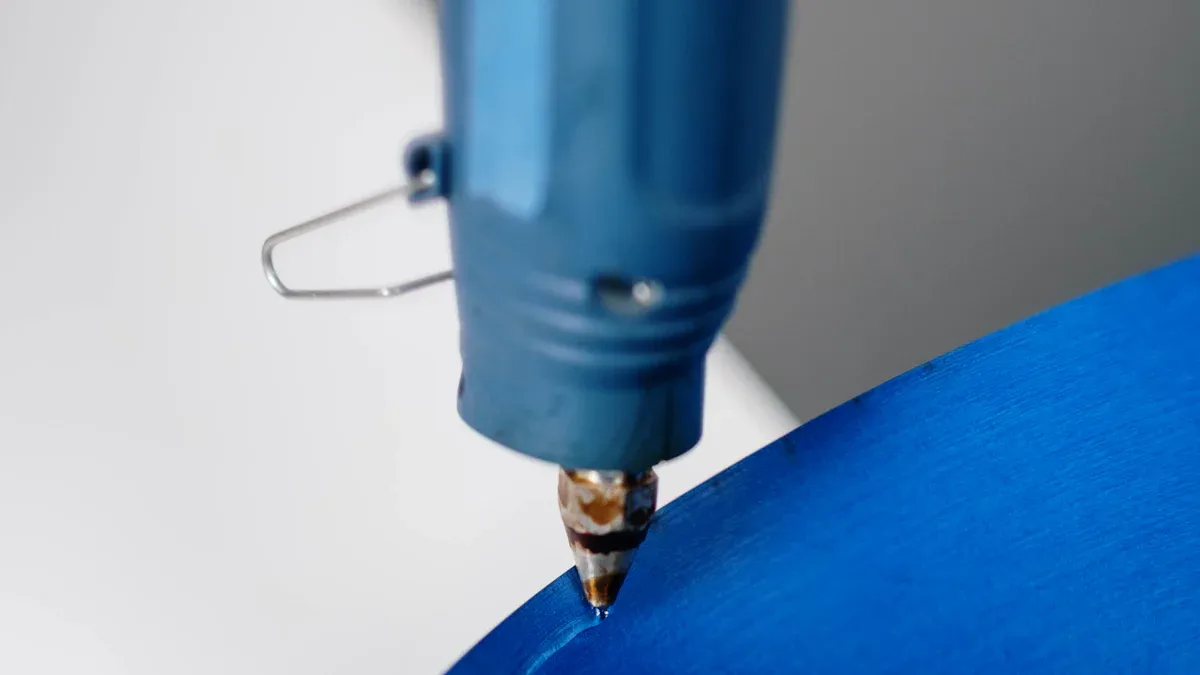
Apply Heat Evenly
Use a heat gun to shrink the PET heat shrink tubing. Set the heat gun to a starting temperature of 75°C. Do not let the temperature go above 135°C. Move the heat gun slowly back and forth along the tubing. Keep the heat gun about 2 to 4 inches away from the tubing. This helps you avoid burning or melting the PET. Turn the wire or part as you heat it. This makes sure the tubing shrinks evenly on all sides.
Start heating at one end and work your way to the other.
Watch for the tubing to start shrinking and fitting tightly.
For adhesive-lined PET heat shrink tubing, keep heating until you see the adhesive melt and flow.
Note: Never use an open flame. Flames can damage PET and cause uneven shrinking.
Monitor Shrinkage
Watch the PET heat shrink tubing as it shrinks. The tubing will get smaller and wrap tightly around your wire or part. Make sure the tubing does not bunch up or wrinkle. If you see bubbles or gaps, stop heating and smooth out the tubing with your fingers or a tool. For -55°C to 135°C PET heat shrink tubing, you want a smooth, tight fit. The tubing should cover the whole area with no spaces or loose spots.
What to Watch For | What to Do |
|---|---|
Tubing shrinks unevenly | Move heat gun more evenly |
Bubbles or wrinkles | Pause, smooth with tool/finger |
Tubing not tight enough | Apply a bit more heat |
Tip: If you use adhesive-lined PET, check that the melted adhesive forms a seal at the ends. This keeps out water and dust.
Cool and Set
Let the PET heat shrink tubing cool down on its own. Do not touch or move the tubing until it feels cool. This helps the tubing set in place and keeps the fit tight. For adhesive-lined PET heat shrink tubing, cooling lets the adhesive bond fully. If you rush this step, the tubing might not stick well or could shift out of place. Natural cooling gives the best results for -55°C to 135°C PET heat shrink tubing.
Safety Reminder: Always let the tubing cool before you handle it. Hot PET can cause burns.
You now know how to use heat shrink tubing for a perfect fit. By following these steps, you make sure your PET heat shrink tubing works well in any temperature, from freezing cold to hot environments. This method protects your wires and parts for a long time.
Avoid Common Mistakes
When you install pet heat shrink tubing, you want to avoid common mistakes. These errors can cause weak seals, poor protection, or even damage to your wires. Here are the main problems you might face and how to prevent them.
Overheating
If you use too much heat, pet heat shrink tubing can burn or melt. The tubing may become brittle or lose its shape. Always use a heat gun set within the safe range for pet. Move the heat gun back and forth. Do not hold it in one spot. Overheating can also cause the tubing to shrink unevenly or form holes. You want the tubing to look smooth and tight, not scorched.
Tip: Keep the heat gun moving and watch the tubing closely as it shrinks.
Underheating
If you do not use enough heat, the tubing will not shrink fully. Loose tubing will not protect your wires well. You may see gaps or wrinkles. Start at the lowest temperature that works for pet heat shrink tubing, then slowly increase if needed. Make sure the tubing hugs the wire or part tightly. Underheating can also stop adhesive-lined tubing from sealing.
Wrong Size
Choosing the wrong size tubing is a common mistake. If the tubing is too small, it will not fit over your part. If it is too large, it will not shrink tight enough. Pet heat shrink tubing comes in different shrink ratios, like 2:1 and 4:1. A 2:1 ratio means the tubing shrinks to half its original size. A 4:1 ratio means it shrinks to a quarter of its size. Picking the right size and shrink ratio helps you get a perfect fit and avoid problems like poor fit or device failure.
Always check the diameter of your wire and the shrink ratio of the tubing.
Proper sizing keeps your installation safe and secure.
Poor Prep
Good preparation is key for a strong seal. If you skip cleaning, dirt or oil can stop the tubing from sticking. Cut the tubing with smooth edges and make sure it covers the area fully. Take your time with preparation. Clean surfaces and careful cutting help pet heat shrink tubing last longer and work better.
Note: Careful preparation stops problems before they start.
Finish and Inspect
Check Fit
After the tubing cools, you should check the fit. Look at the tubing to make sure it covers the whole area. The tubing should feel snug and smooth. Run your fingers along the tubing to check for any gaps or loose spots. If you see wrinkles or bubbles, you may need to reheat the tubing gently. Good tubing will hug the wire or part tightly. You want the tubing to protect your connection from dust, water, and other damage.
Tip: Shine a light on the tubing to spot any missed areas or thin spots. This helps you find problems before they cause trouble.
Seal Ends
Sealing the ends of the tubing gives extra protection. You can use a small amount of adhesive or special end caps for this step. Press the ends of the tubing down while they are still warm if you want a tighter seal. For adhesive-lined tubing, check that the melted glue has flowed to the ends. This step keeps out moisture and dirt. Sealed tubing lasts longer and works better in harsh places.
Use end caps for extra strength.
Press the tubing ends for a better seal.
Check for any leaks or gaps at the ends.
Safety Tips
You should always follow safety rules when working with tubing. Wear gloves to protect your hands from heat. Keep your work area clean and free from clutter. Never touch hot tubing with bare hands. Use a heat gun safely and keep it away from children. Store unused tubing in a dry, cool place. This keeps the tubing in good shape for your next project.
Safety Step | Why It Matters |
|---|---|
Wear gloves | Prevent burns from hot tubing |
Clean workspace | Avoid accidents with tubing |
Store tubing well | Keep tubing ready for use |
Remember, safe habits help you get the best results with tubing every time.
You can get a good result with PET heat shrink tubing if you follow some easy steps. First, measure your parts and pick tubing that is almost the same size before shrinking. Next, get your tubing and workspace ready so everything stays clean. Then, use heat carefully and keep the tubing at the right temperature. Hold the ends and heat the tubing evenly so it shrinks the right way. Turn the tubing and start in the middle to stop wrinkles. If you do these things, your tubing will keep wires safe and work well in very hot or cold places.
FAQ
How do you know if you picked the right size PET heat shrink tubing?
Measure the widest part of your wire or component. Choose tubing with an original diameter at least twice as wide. After shrinking, the tubing should fit snugly with no gaps.
Tip: Always check the shrink ratio on the packaging.
Can you use a hair dryer instead of a heat gun?
A hair dryer does not get hot enough for PET heat shrink tubing. You need a heat gun that reaches at least 75°C. This ensures the tubing shrinks evenly and seals well.
What should you do if the tubing shrinks unevenly?
Move the heat gun slowly and evenly. Rotate your wire or part as you heat it. If you see wrinkles, pause and smooth them out with a tool or your fingers while the tubing is still warm.
Is PET heat shrink tubing waterproof?
PET heat shrink tubing resists water well. For a waterproof seal, use adhesive-lined PET tubing. The melted adhesive blocks moisture and dust from getting inside.
Tubing Type | Water Resistance |
|---|---|
Standard PET | Good |
Adhesive-lined PET | Excellent |
Can you remove PET heat shrink tubing after installation?
You cannot reuse PET heat shrink tubing once it shrinks. If you need to remove it, cut it off carefully with a sharp tool. Always use caution to avoid damaging wires or components.
See Also
Leading Manufacturers of Sterilizable FEP Heat Shrink Tubing

© Copyright 2024 My First Blog - All Rights Reserved.