How to Use Shrink Wrapping Tubes for Product Packaging and Protection

You use shrink wrapping tubes to cover products and keep them safe. The wrap makes a tight seal around each item. This seal protects your products from dust and dirt. It also keeps out moisture and UV rays. Manufacturers say there are many good things about shrink wrapping tubes:
The wrap stays strong for a long time and does not get weak or droopy.
It uses only a little material, so it saves money.
The material does not tear or get holes easily, so products stay safe when moving.
If someone tries to open it, you can see it right away. This helps keep food and medicine safe.
You can use shrink tubes to package things of many shapes and sizes.
You can learn how to do this even if you are new to packaging. You can also learn if you already know about packaging.
Key Takeaways
Shrink wrapping tubes keep products safe from dust and water. They also stop people from messing with the items. This helps keep things safe when moving them.
Pick the right size shrink tube by measuring your product well. This stops the tube from ripping and makes sure it fits tight.
Use a heat gun to shrink the tube for best results. It gives you more control than using a hair dryer.
Let air out of the shrink tube to stop ballooning and wetness. This keeps your products looking good and fresh.
Shrink tubes save money and can be used in many ways. They work for lots of products in different businesses.
What Is a Shrink Tube
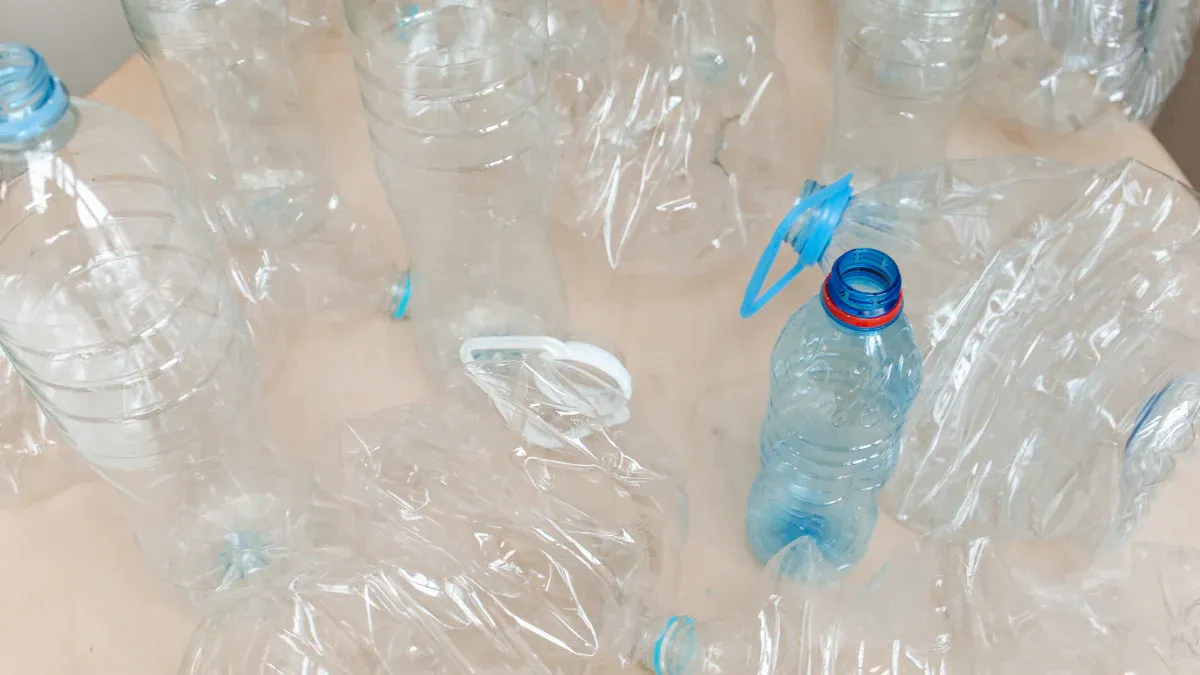
A shrink tube is a soft plastic sleeve. You put it around a product. When you heat it, the tube gets smaller. It wraps tightly and seals the item. Shrink tubes are used for jars, candles, bottles, and cables. The tube fits close and keeps the product safe from things outside.
Common Uses
Shrink tubes are used in many fields. Here are some examples:
Food & Beverage: Shrink tubes are used for snacks, drinks, and sauces. They give a full design and stop tampering.
Pet Care: Shrink tubes are used for pet food and shampoos. They help stop tampering and show the brand.
Health Care Products: Shrink tubes wrap vitamins and supplements. They make products look nice.
Home and Personal Care: Shrink tubes are found on cosmetics. They show if someone opened it and make products look good.
Automotive: Shrink tubes are used for fuel additives and cleaners. They keep products safe and allow for different designs.
You can pick from different shrink tube materials. Here is a table with the most common types:
Material | Description |
|---|---|
PVC | Light and cheap, but can be harmful and has weak shrink force. |
Polyolefin (POF) | Strong, flexible, does not tear easily, seals well, and is fully recyclable. |
Polyethylene (PE) | Comes in LDPE, LLDPE, and HDPE; LDPE is best for shrink wrapping because it is strong. |
Key Benefits
Shrink tubes have many good points over regular packaging. Here are some main benefits in this table:
Advantage | Description |
|---|---|
Improved Handling and Transport | Shrink wrap holds items together. It stops them from moving and getting damaged. |
Cost Efficiency | It uses less material than regular packaging. This saves money on supplies and shipping. |
Enhanced Inventory Management | Shrink tubes are compact. They help stack and organize products better in warehouses. |
Customization Opportunities | Shrink tubes can fit many shapes and sizes. This makes products look better. |
Shrink tubes are strong against tampering and weather. The materials keep water out and handle tough conditions. You can use shrink tubes to protect cables and wires from heat, chemicals, and moisture. The tube shrinks tight and keeps your product safe from harm and tampering.
How to Use Shrink Tubes
Choosing the Right Size
First, measure your product before you pick a shrink tube. Measure the biggest and smallest parts. Use a ruler or calipers to be exact. Look at a size chart to find a tube a little bigger than your largest measurement. The shrunk tube should be just smaller than the smallest part. If the tube is too tight, it might break or not work.
Here is a table that shows how size matters for packaging:
Dimension Type | Description |
|---|---|
Expanded Inside Diameter (ID_exp) | Must be larger than the largest diameter of the object for easy application. |
Recovered Inside Diameter (ID_rec) | Must be smaller than the smallest diameter of the object to ensure a snug fit. |
Shrink Ratio | Describes the relationship between expanded and recovered diameters, affecting versatility and cost. |
Wall Thickness | Affects the final thickness after shrinking, critical for insulation and abrasion resistance. |
Longitudinal Shrinkage | Length reduction during shrinkage, important for precise cut lengths in applications. |
Tip: Do not pick a tube that is too small. This helps stop splitting and keeps your product safe.
Cutting and Sealing
Cut the shrink tube to the right length. Pick tubing that is about 20-30% bigger than your product before shrinking. Use sharp scissors or a cutter. Make sure your cuts are straight and clean. This stops the tube from fraying and makes it look neat. Cut the tube about half an inch longer than what you want to cover.
Use sharp scissors or a razor blade for clean cuts.
Cut the tube 1.3 cm (1/2 in) longer than the part you want to cover.
Make sure the ends are straight for a good seal.
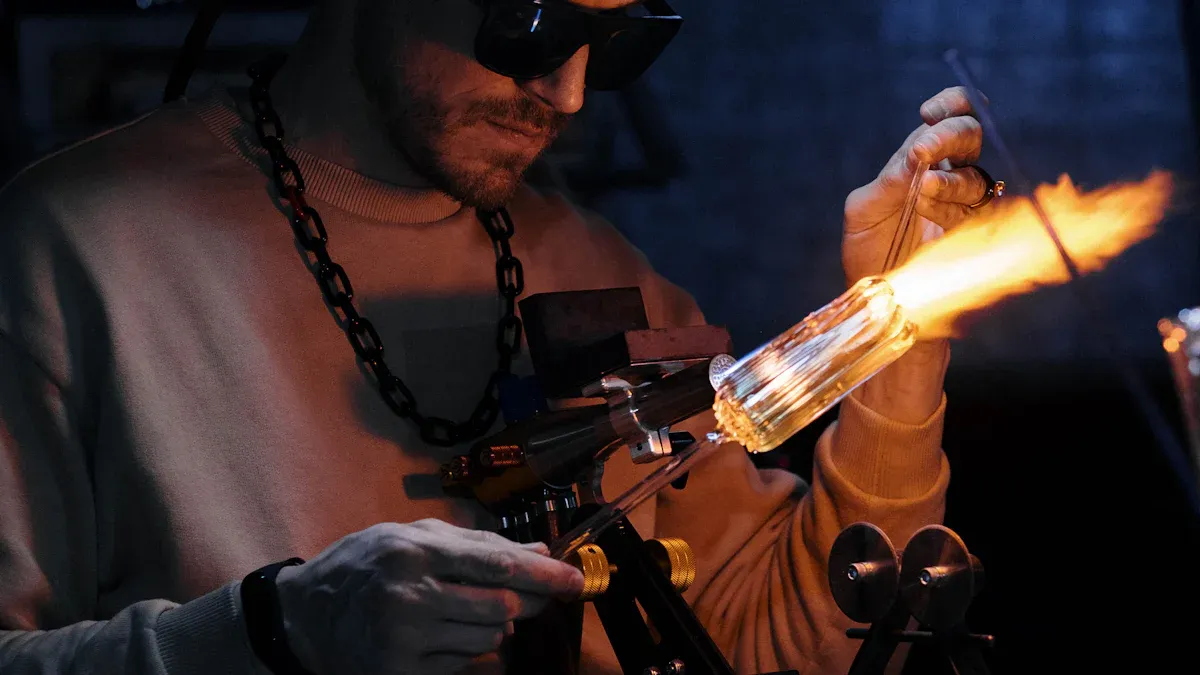
Applying Heat
You need to heat the tube so it shrinks around your product. A heat gun works best for this job. Hair dryers can work for small things, but they do not get hot enough for most shrink wrapping. Heat guns give better results and help you avoid problems.
Tool | Temperature Capability | Intended Use |
|---|---|---|
Heat Gun | High temperatures | Effective for shrink wrapping |
Hair Dryer | Limited temperature | Not designed for serious shrink wrapping applications |
Note: Use a heat gun for bigger tubes or professional work.
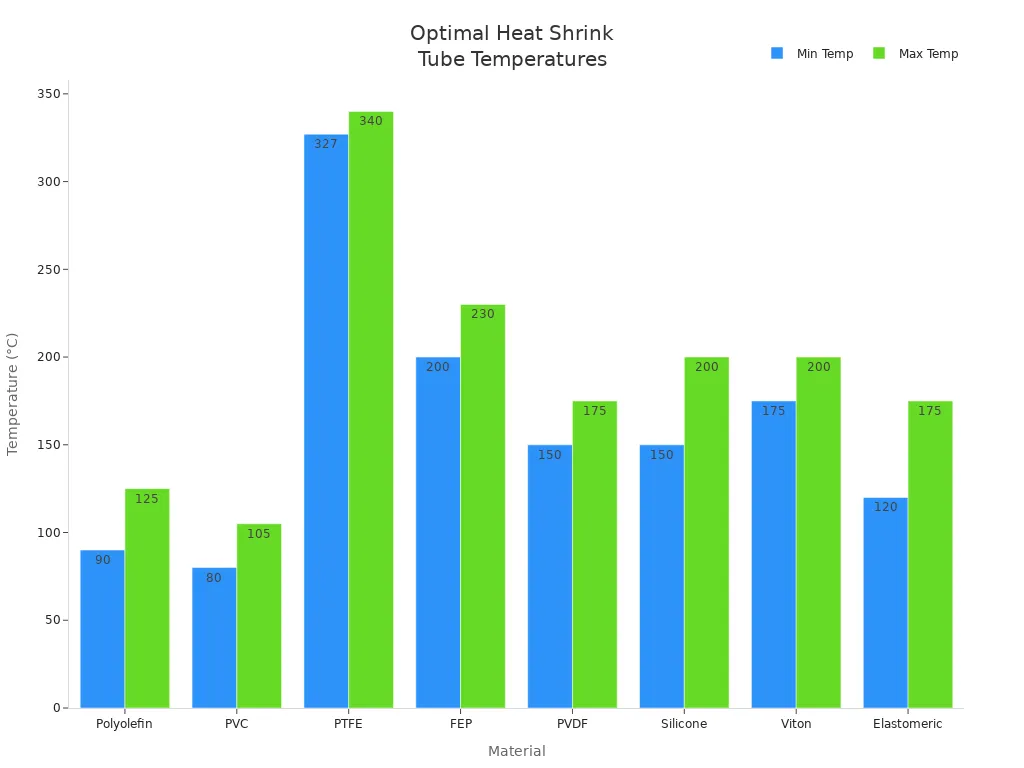
The temperature you need depends on the material. Here is a chart with the best temperatures for different shrink tube materials:
Material | Temperature Range (°C) |
|---|---|
Polyolefin | 90 – 125 |
PVC | 80 – 105 |
PTFE | 327 – 340 |
FEP | 200 – 230 |
PVDF | 150 – 175 |
Silicone | 150 – 200 |
Viton | 175 – 200 |
Elastomeric | 120 – 175 |
Most projects use about 150°C (302°F). Move the heat gun slowly and evenly. This helps the tube shrink smoothly and stops overheating.
Safety Alert: Keep your hands away from the heat. Wear gloves and safety glasses to stay safe.
Venting Tips
You can add vents to make your shrink-wrapped products better. Vented film lets air out as the tube shrinks. This stops ballooning and keeps moisture away. You can buy film with holes or make small holes yourself.
Benefit | Description |
|---|---|
Air Circulation | Vented bags let air move around the product. |
Temperature Control | They help control temperature and humidity. |
Moisture Reduction | They lower sweating and stop condensation. |
Follow these steps for venting:
Make small holes in the film.
Let hot air out while shrinking.
Stop the film from ballooning.
Tip: Venting helps keep your products dry and looking nice.
Shrink tubes work for many products. If you follow these steps, you will get a tight, neat, and safe package every time.
Materials and Equipment
Essential Tools
You need the right tools to get the best results from your packaging process. Start with a shrink tube, a heat sealer, a heat gun or hair dryer, and a good pair of scissors. Each tool has a special job. The heat sealer closes the ends of the tube. The heat gun shrinks the plastic tightly around your product. Scissors help you cut the tube to the right size.
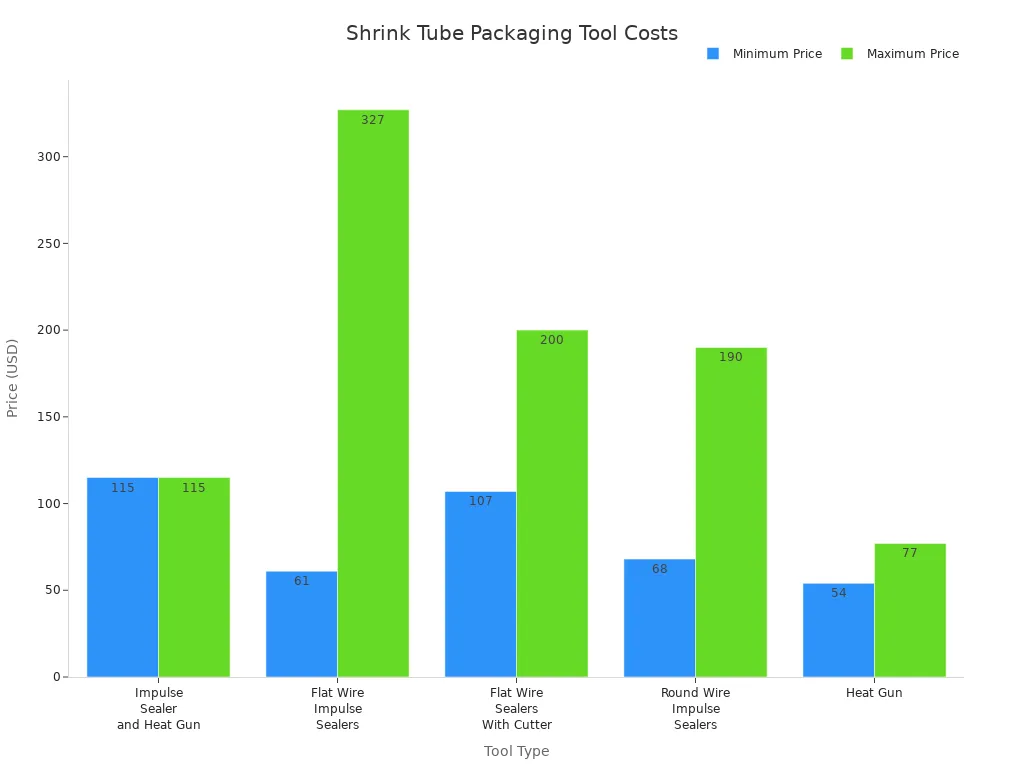
Here is a table that shows common tools and their price ranges:
Tool Type | Description | Price Range |
|---|---|---|
Impulse Sealer and Heat Gun | Basic type of shrink wrap machine | $115 (total) |
Flat Wire Impulse Sealers | For heavier shrink wrap gauges | $61 - $327 |
Flat Wire Impulse Sealers With Cutter Blade | Seals and cuts quickly | $107 - $200 |
Round Wire Impulse Sealers | Good for centerfold shrink wrap and bags | $68 - $190 |
Heat Gun | Basic heating element for low output operations | $54 - $77 |
Modern machines can adjust sealing settings by themselves. This saves you time and makes setup easier. Automated tools also help you work faster and keep your results the same every time.
Selecting Shrink Tube Material
You should choose your material based on what you need to protect. Think about these points:
Check if the material meets safety rules like UL/CSA, ASTM, or EU standards.
Know if you need electrical safety, like flame resistance.
Think about where you will use the tube—inside or outside.
Look at how much the tube will bend or rub against things.
Decide if it will touch oils, chemicals, or water.
Pick a material that fits your temperature range and resists corrosion.
Choose the right shrink ratio, such as 2:1, 3:1, or 4:1, for a good fit.
The thickness and flexibility of the tube matter. If the tube does not shrink back to its full thickness, it may not protect your product well. A higher shrink ratio lets you cover more shapes and sizes. Polyolefin, PE, PVC, and PTFE are common choices for different jobs.
Safety Tips
You must stay safe when using heat tools. Here are some important tips:
Wear heat-resistant gloves and safety goggles.
Work in a space with good airflow.
Keep a fire extinguisher nearby.
Never wrap hot or powered equipment.
Always read and follow the instructions for your tools.
Tip: Use personal protective equipment every time you work with heat. This keeps you safe from burns and fumes.
Troubleshooting Shrink Tubing
Fixing Wrinkles or Loose Wraps
Sometimes, you might see wrinkles or loose spots after shrinking the tube. Wrinkles can show up if air gets trapped inside. They also happen if you do not heat the tube evenly. To fix this, make small holes for air to escape. You can use a perforating roller for this job. Move your heat gun back and forth over the tube. Hold it about 6 to 10 inches away. This helps the tube shrink the same all over and stops slack.
If you see dog ears or crow’s feet, check your heat and film size. Dog ears mean the film did not shrink enough. Crow’s feet mean you used too much film. Try using more heat or a smaller piece of film. Troubleshooting works best if you go step by step. Find the problem and fix it before you finish packaging.
Tip: Turn the product while you use the heat gun. This helps the tube shrink evenly and look better.
Preventing Overheating
Too much heat can hurt your shrink tube. You might see melting, color changes, or cracks. The tube can get weak and stretchy if it gets too hot. This can make connections unsafe.
To stop this, keep the heat gun away from the tube. Watch the tube as you heat it. Use a heat gun for big tubes because it gives you more control. Do not keep the heat gun in one spot for too long. Move the heat gun around the tube for even heating.
Common Issue | Impact on Durability | Solution |
|---|---|---|
Thermal Stability | Melting or deformation | Select materials with higher resistance |
Overheating | Cracking or splitting | Monitor heat and adjust distance |
Handling Tears
Tears can happen if the tube is too small or stretched too much. If your tube tears, check if you picked the right size. Pick a tube that is strong enough for your product. You can also use special materials that are tougher or resist chemicals.
Water can also make the tube weak. Use tubes that do not let water in easily. Keep shrink tubes in a cool, dry place so they do not get damaged.
Note: If you see a tear, stop and get a new tube. Using a broken tube can make your product unsafe.
You can fix most shrink tube problems by changing how you work and picking the right materials. Careful heating and good sizing help you get a neat and safe wrap every time.
You can use shrink wrapping tubes to keep products safe and make them look nice. This method is easy and works for many things. Here are some main reasons to use shrink wrapping tubes:
Advantage | Description |
|---|---|
Flexibility | Fits many shapes and sizes. |
Protection | Stops dust, water, and damage. |
Tamper Evidence | Shows if someone opened the package. |
Branding | Lets you put logos and details on the package. |
Cost-Effectiveness | Costs less than other packaging. |
Versatility | Good for one item or many items together. |
You keep products safe when you ship them.
You help food and other goods last longer.
You make items look better in stores.
Try using shrink wrapping tubes for your next project. If you want more information, check out Shrink Film 101 - A Guide to Shrink Film Packaging or How to Shrink Wrap - U.S. Packaging & Wrapping.
FAQ
How do you know which shrink tube size to use?
You should measure the widest part of your item. Pick a shrink tube that is a little bigger. This helps the tube fit well after shrinking. Always check the size chart before you buy.
Can you use a hair dryer instead of a heat gun?
You can use a hair dryer for small projects. It does not get as hot as a heat gun. For best results, use a heat gun. It works faster and gives a tighter wrap.
Is shrink tube safe for food packaging?
Yes, many shrink tubes are safe for food. You should check the label for food safety approval. Only use tubes that meet safety standards for food contact.
What should you do if the shrink tube wrinkles?
If you see wrinkles, move the heat source slowly and evenly. Turn your item as you heat it. This helps the tube shrink smoothly. Make small holes to let air escape if needed.
Can you print your logo on a shrink tube?
Yes, you can order custom shrink tubes with your logo or design. This helps your product stand out. Ask your supplier about printing options.
See Also
Key Guidelines for Effective Use of FEP Tubing
Applications of Heat Shrink Tubing for Electrical Insulation
FEP Heat Shrink Tubing Applications Across Various Sectors

© Copyright 2024 My First Blog - All Rights Reserved.