How to Achieve High Surface Finish in Nitinol Micro Tubing Manufacturing

To achieve a high surface finish on nitinol micro tubing, selecting the right material is essential. The process involves specialized tube forming techniques followed by multiple finishing steps. Electropolishing plays a key role in producing a very smooth surface, reaching as low as Ra 0.1 μm, while also preventing tiny cracks from developing. Chemical etching removes minor imperfections and contaminants, enhancing the tubing’s strength and durability. Maintaining strict process control and using precise machinery ensures dimensional accuracy, such as keeping the outer diameter within ±0.005 mm for tubes 0.3 mm or smaller. Continuous monitoring throughout production helps maintain consistent quality in high surface finish nitinol micro tubing.
Tip: Electropolishing not only smooths the surface but also prevents rust and creates a nickel-free oxide layer, making the tubing safer for medical applications.
Step | Result |
|---|---|
Electropolishing | Ra 0.1 μm surface roughness |
Precision tube drawing | ±0.005 mm OD tolerance |
TiO2/TiN coatings | Up to 50% less corrosion and rust |
Key Takeaways
Start with high-purity nitinol and use vacuum induction melting. This helps make strong and smooth tubes with fewer problems.
Shape the tubes with careful drawing, sizing, and cutting. This keeps the size exact and stops surface damage.
Take away iron particles before finishing. This stops rust and makes the tube last longer and feel smoother.
Electropolishing is very important for a smooth, rust-free surface. This makes the tube safe for medical use.
Check the tubes often with special tools and measurements. This makes sure the tubes are always good and meet medical rules.
Material Purity
Nitinol Alloy Selection
To get a smooth finish on ti-ni1 super elastic nitinol tube, you need to pick the right nitinol alloy. High-purity nitinol has less non-metal stuff inside. This helps the tube have a smoother surface and last longer. Research shows that smaller and fewer inclusions make the tube stronger and smoother. Cracks often start at these inclusions, so having less of them is important for good quality and long life.
Has less non-metal stuff inside.
Lasts longer without breaking.
Makes the surface smoother for ti-ni1 super elastic nitinol tube.
Always use nitinol that follows ASTM F2063 rules. This keeps the inclusions small and helps you make better nitinol tubes. When you use pure nitinol and finishing steps like electropolishing, you can get a surface roughness as low as Ra 0.1 μm. This smooth finish lowers friction and makes medical devices safer.
Vacuum Induction Melting
Vacuum induction melting, or VIM, is a way to make nitinol even more pure. In VIM, the alloy melts in a vacuum. This takes away unwanted gases and dirt. The result is ti-ni1 super elastic nitinol tube with fewer particles and a smoother surface.
Melting Method | Inclusion Density | Fatigue Life | Surface Quality |
|---|---|---|---|
Standard VAR | High | Low | Fair |
High-Purity VAR | Medium | Medium | Good |
VIM-VAR | Low | High | Excellent |
Using VIM-VAR gives you nitinol tubing that is strong and smooth. This is very important for ti-ni1 super elastic nitinol tube used in medicine and airplanes. By starting with pure nitinol and the right process, you make sure every ti-ni1 super elastic nitinol tube is high quality.
Note: Pure material and the best melting process help you get a perfect surface on ti-ni1 super elastic nitinol tube. If you control these steps, you will do well in the next parts of making the tube.
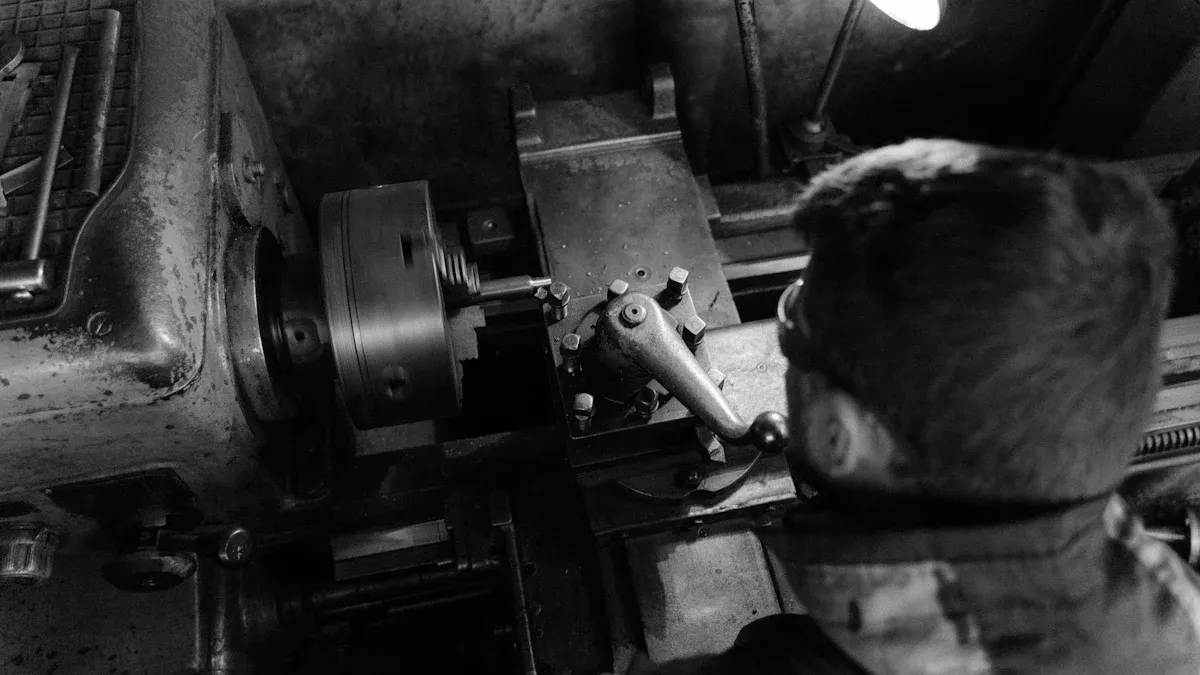
Tube Formation
Drawing and Sizing
First, you make nitinol wire by drawing and sizing. This step shapes the ti-ni1 super elastic nitinol tube to the right size. Special dies and mandrels pull the nitinol through. This makes the tube thinner and sets the wall thickness. You must be very careful. Even a tiny mistake can change the surface and finish.
The table below shows how exact the sizes must be. These tight tolerances help you get the best medical-grade ti-ni1 super elastic nitinol tube.
Tube Outer Diameter Range (mm) | Outer Diameter Tolerance (mm) | Inner Diameter Tolerance (mm) |
|---|---|---|
Up to 0.3 | ±0.005 | ±0.010 |
0.3 to 0.5 | ±0.007 | ±0.015 |
0.5 to 1.5 | ±0.015 | ±0.020 |
1.5 to 2.5 | ±0.020 | ±0.030 |
2.5 to 3.5 | ±0.020 | ±0.040 |
You use laser micrometers and measuring machines to check the tubes. This makes sure every ti-ni1 super elastic nitinol tube meets the rules. Sometimes, you use centerless grinding or draw the tube again. This helps get the right size and a smoother surface.
Micro Abrasive Waterjet Cutting
To cut the tubes, you use micro abrasive waterjet technology. This method gives clean cuts with no burrs on the ti-ni1 super elastic nitinol tube. The waterjet uses tiny abrasive bits and strong pressure to cut nitinol. It does not make heat, so the surface stays smooth. This also stops small cracks from forming. You do not get rough edges, so the finish and quality stay good.
Heat Treatment
Heat treatment is an important step for nitinol wire. You use set temperatures and times to shape and improve the ti-ni1 super elastic nitinol tube. This step changes the crystal structure. It makes the tube super elastic and strong.
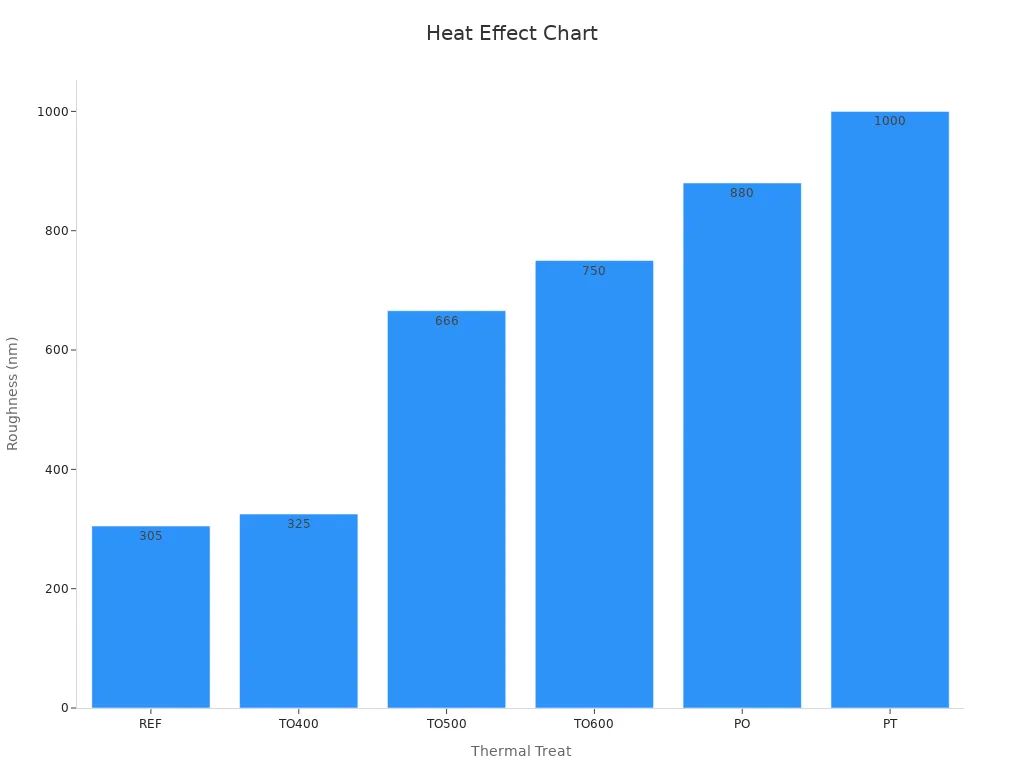
The table below shows how heat treatment changes surface roughness and adhesion strength:
Thermal Treatment | Temperature (°C) | Duration (min) | Surface Roughness (Ra, nm) | Adhesion Strength Increase (%) |
|---|---|---|---|---|
REF (Reference) | N/A | N/A | 305 | Baseline |
TO400 | 400 | 30 | 325 | +28% |
TO500 | 500 | 30 | 666 | +61% |
TO600 | 600 | 30 | 750 | +111% |
Higher temperatures make the surface rougher and increase adhesion strength. You need to balance the process to get the best finish for your ti-ni1 super elastic nitinol tube.
Tip: Always watch the heat treatment step closely. Small changes in temperature or time can change the surface and the final nitinol properties.
Surface Finishing
Polishing Stages
To get a smooth finish on nitinol micro tubing, you use several polishing steps. Each step helps remove flaws and gets the tube ready for the next part. First, rough polishing takes away big defects. Then, fine polishing makes the surface even smoother. Last, buffing gives the tube a shiny, mirror-like look. Doing these steps in order helps the tubing meet tough medical rules.
Here is a table that shows how different polishing methods make the surface smoother:
Polishing Method | Material | Stage | Surface Roughness (Ra) Before (μm) | Surface Roughness (Ra) After (μm) | Notes/Parameters |
|---|---|---|---|---|---|
Multi-Jet Polishing (MJP) | 316L Stainless Steel | Final polishing | 2.269 | 0.030 | Removes laser melting marks, debris, oxide layers |
Rotating-Vibrating Magnetic Abrasive | Not specified | Multi-stage | 7.22 | 0.23 (integration) | Progressive reduction through stages |
Magnetic Abrasive Finishing (MAF) | Stainless Steel sanitary tube | Polishing | 4.0 | 0.1 | 10 min finishing with correct magnetic fluid |
Magnetic Abrasive Finishing (MAF) | AlSi10Mg (L-PBF) | Polishing | 4–10 | ~0.01 (10 nm) | Spindle speed, feed speed, machining gap |
You can see that each polishing step makes the surface much smoother. If you follow this process, you can get Ra values as low as 0.1 μm or even better. This smoothness is very important for nitinol micro tubing used in medical tools.
Tip: Always check every polishing step. Even small changes in speed or abrasive type can change the final finish and how the tubing works.
Surface Iron Removal
Iron particles can get stuck in the nitinol during making. If you do not remove them, they can cause rust and make the tube not last as long. You need to take out the iron before nitinol electropolishing. Chemical cleaning, like acid pickling, gets rid of iron but does not hurt the nitinol. This step gets the tube ready for the next part and helps make the finish even.
Taking out iron also makes the surface finishing work better. You lower the chance of pitting and help the tube fight rust. This step is very important for nitinol micro tubing, especially for medical and airplane uses.
Note: If you skip iron removal, you can get surface problems and less rust protection, even after electropolishing.
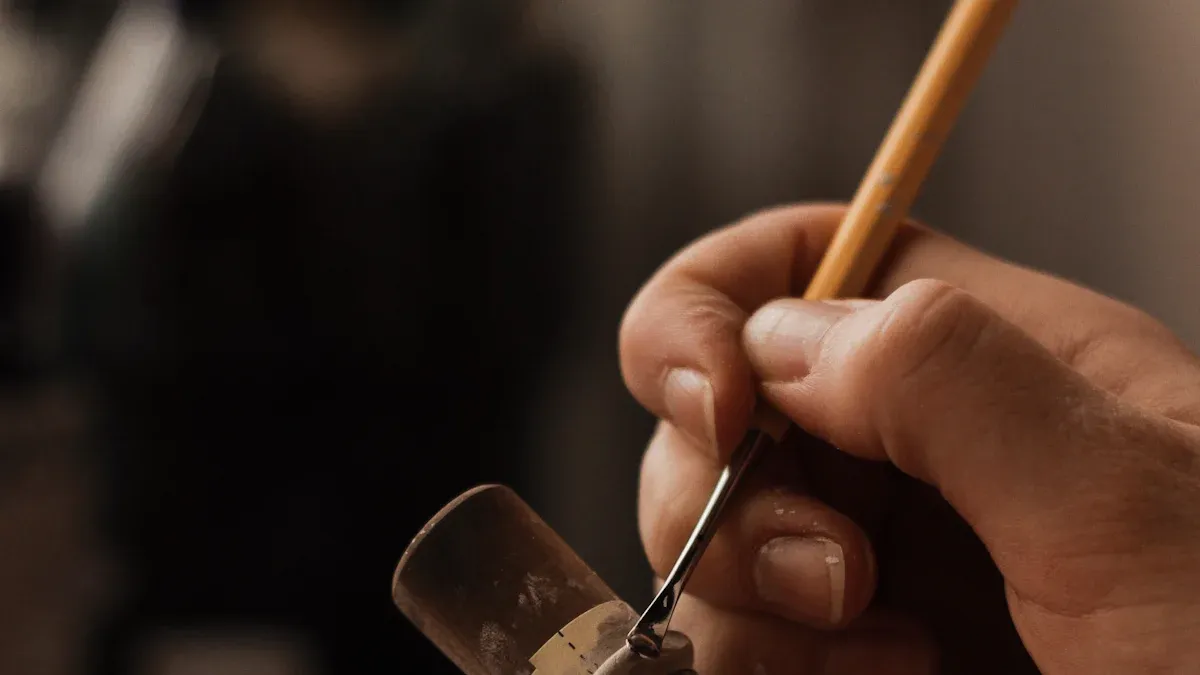
Nitinol Electropolishing
Nitinol electropolishing is the most important step for a smooth finish. This uses electricity and chemicals to take off a thin layer from the surface. It makes the surface flat and shiny, with no tiny bumps or holes. Electropolishing also makes a special oxide layer that helps stop rust and makes the tubing safer for the body.
You can see the good things about nitinol electropolishing in this table:
Surface Finish | Breakdown Potential (mV) | Surface Nickel Concentration (%) |
|---|---|---|
Oxidized Tubing | -117 | N/A |
Electropolished (EP) | Up to 1000 | Reduced from 11.5 to 1 |
Electropolishing raises the breakdown potential from -117 mV to up to 1000 mV. This means the tubing is much better at fighting rust. The process also drops the nickel on the surface from 11.5% to just 1%. This makes the tubing safer for people.
Nitinol electropolishing also helps the tubing work well with the body. Tests show that electropolished tubing does not hurt cells or blood. The tubing passes tough rules for medical tools. You get a finish that is smooth, clean, and safe.
Callout: Nitinol electropolishing is needed to reach Ra ≤ 0.1 μm, which is the top standard for smooth nitinol micro tubing.
When you use polishing, iron removal, and nitinol electropolishing together, you make tubing that meets the highest standards. You control how rough the surface is, how well it fights rust, and how safe it is for the body. The full surface finishing process makes sure your tubing works well in hard jobs.
Quality Control
Surface Inspection
Every nitinol micro tube needs to be checked for quality. Start by looking at the tubes with CCTV cameras or borescopes. These tools help you see inside and outside the tube. Check for any damage, rust, or problems on the surface. Use Ultrasonic Testing and Electromagnetic Inspection to find hidden problems. These tests do not hurt the tube. Write down all your inspection results. Take photos and make notes about any problems you find.
Tip: Checking tubes often and writing good notes helps you find patterns and stop problems before they get worse.
Follow ISO 13485 rules when you check your tubes. This means you need to use Statistical Process Control to watch your production data. You also need to do regular checks and keep good records. These steps make sure your nitinol tubing is safe for medical use. Train your team and update your inspection steps to keep your quality high.
Main inspection steps:
Look for problems on the surface
Use special tests to find hidden issues
Write down details and take photos
Check your process often and review your work
Roughness Measurement
You must check how rough the surface is after each finishing step. Use 3D microscopy or Scanning Electron Microscopy to measure the surface. These tools show tiny bumps and holes on the tube. After nitinol electropolishing, the surface should look very smooth. Electropolishing takes away small flaws and makes the tube shiny.
Changing the time and temperature during electropolishing changes how smooth the tube is. For example, polishing at 65 °C for 180 seconds gives a smooth, clean surface. If the temperature is too high, the tube can get rougher or even damaged. Always control your settings to get the best finish.
Use Statistical Process Control to watch your roughness data over time. This helps you see if something changes and fix it fast. Careful measuring and good process control make sure every nitinol tube has a great surface finish.
Callout: Checking roughness after every electropolishing step makes sure your nitinol tubing is safe and works well for medical jobs.
You can get the best results with nitinol in medicine by following careful steps. First, use pure materials. Next, shape the tube with exact tools. Then, finish the surface with special methods. Careful checks make sure the nitinol is high quality. Research shows a smooth titanium dioxide layer with little nickel helps stop rust and works well with the body. Using these good steps makes nitinol safer and better for medical use.
FAQ
What is the ideal surface roughness for nitinol micro tubing?
The best surface roughness is Ra ≤ 0.1 μm. This makes the tube very smooth. It helps lower friction. It also meets tough rules for medical devices.
Why does electropolishing matter for nitinol tubing?
Electropolishing takes away tiny flaws on the tube. It makes a strong oxide layer on the surface. The tube gets smoother and cleaner. It also fights rust and works well in medicine.
How do you check the surface quality of nitinol tubes?
You can use 3D microscopy or scanning electron microscopy. These tools show small bumps and holes. Always write down your results. Check if the roughness matches your goal.
Can you skip the iron removal step?
If you skip iron removal, the tube can rust. The tube may not be as strong. Always take out iron before electropolishing. This helps the tube stay smooth and fight rust.
What happens if you use low-purity nitinol?
You might see more surface problems.
The tube can break more easily.
The finish will not pass medical rules.
Pick high-purity nitinol for the best tubes.
See Also
Manufacturing Process of Nitinol Tubing for Medical Use
Detailed Steps to Create Nitinol Microtubing for Neurovascular
How To Choose The Best Nitinol Tubing Step By Step
Choosing The Right Nitinol Tubing Supplier For Your Needs
Comprehensive Guide To Nitinol Parts And Manufacturing Methods

© Copyright 2024 My First Blog - All Rights Reserved.