The common failure modes of PET heat shrink in minimally invasive surgery tools

PET heat shrink in minimally invasive surgery tools can break in many ways, including common failure modes such as insulation breakdown, mechanical fatigue, chemical and thermal damage, and edge wear or delamination. Each of these common failure modes can make the tool less reliable and less safe for patients. Identifying these common failure modes early helps prevent accidents. Addressing and fixing these common failure modes keeps patients and surgical staff safe.
Key Takeaways
Check PET heat shrink often for cracks, peeling, or bubbles. This helps you find problems early.
Pick good PET heat shrink tubing. This lowers the chance of insulation breaking and other failures.
Keep PET heat shrink in a cool, dry spot. This stops damage from changes in temperature.
Teach staff how to use and care for PET heat shrink. This keeps tools safe and working well.
Fix any signs of wear or damage right away. This stops bigger problems during surgery.
Common failure modes of PET heat shrink
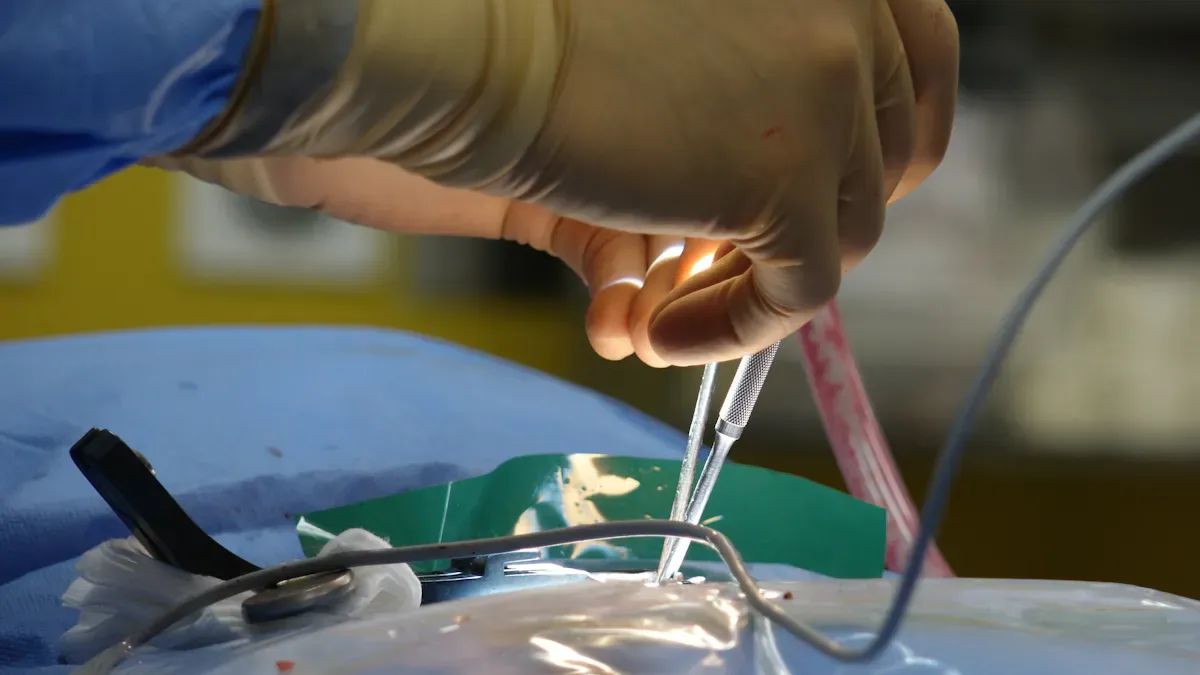
PET heat shrink helps keep surgical tools safe. These tools have to deal with many problems in the operating room. The most common ways PET heat shrink can fail are insulation breakdown, mechanical fatigue, chemical and thermal degradation, and edge wear or delamination. These problems can happen if the size is wrong, the environment is harsh, the tool is used a lot, it gets very hot, or there are mistakes when making it.
Insulation breakdown
Insulation breakdown means the PET heat shrink cannot protect the tool from damage anymore. You might see cracks, peeling, or thin spots on the tubing. Many things can cause insulation breakdown:
If the tool is pushed through metal trocars a lot, small scratches can form.
Using high heat again and again during autoclaving can make weak polymers even weaker.
If someone pulls tissue with the tool shaft, the insulation can start to peel.
You can find insulation breakdown by looking for damage or feeling rough spots. If no one fixes it, this problem can let electricity or sharp edges hurt patients or staff.
Mechanical fatigue
Mechanical fatigue happens when the PET heat shrink is bent, twisted, or stretched many times. After a while, the material can get brittle or have tiny tears. This problem usually starts where the tool bends the most or where the tubing is very thin. Signs of mechanical fatigue are:
Cracks or splits you can see on the shaft.
The covered part does not bend well anymore.
The tool makes strange sounds or moves differently.
Mechanical fatigue can make the tool not work right. The heat shrink might even break during surgery, which can stop the operation and put patients in danger.
Chemical and thermal degradation
Chemical and thermal degradation happen when the PET heat shrink meets strong cleaners or high heat. Hospitals use powerful disinfectants and sterilizers like ethylene oxide and hydrogen peroxide. PET heat shrink can handle many chemicals, but too much can still hurt it over time. High heat from cleaning can also make the material weak, especially if the tubing is not good quality.
You can spot this problem if the tubing looks discolored, feels brittle, or changes texture. If the tubing gets cloudy or sticky, chemical or thermal damage may be starting. This problem can make the heat shrink not protect as well and can make the tool not last as long.
Edge wear and delamination
Edge wear and delamination happen when the ends of the PET heat shrink start to come off the tool. This problem usually starts at the cut edges, which are easy to damage. It can happen if the tool is handled roughly, cut wrong, or rubbed against other things a lot.
Signs of edge wear are:
The ends of the tubing lift or curl up.
Layers of the heat shrink pull apart from each other.
There are gaps between the tubing and the tool shaft.
Edge wear and delamination can let fluids or dirt get under the tubing. This makes cleaning harder and can raise the chance of infection. It can also make the heat shrink break down more.
Tip: Check the tools often to find these problems early. Fixing them soon can stop bigger problems during surgery.
Causes and identification of PET heat shrink failures
Improper sizing and application errors
When PET heat shrink is not the right size, it can fail. If technicians use too much heat, the tubing can turn brittle or change color. If the tubing is not heated evenly, it can shrink in strange ways. This makes the tubing look odd and not protect well. Not following the instructions from the maker can make the tool work badly or get damaged. These mistakes can make weak spots or gaps. This raises the chance of insulation breakdown and other problems.
To find these mistakes, staff can use different tests:
Test Type | Purpose | Expected Outcome |
|---|---|---|
Tensile Strength Test | Checks how strong it is | Tubing does not tear or stretch |
Seal Test | Checks for leaks | No leaks or open spots |
Heat Resistance Check | Checks heat strength | Tubing stays in one piece |
Staff should also look at how the tubing fits. It should fit tightly and cover the right area. The tubing should shrink the same way everywhere. There should be no tears or bubbles. These signs show the tubing was put on right.
Environmental and thermal stress
Strong cleaners and high heat can hurt PET heat shrink. Hospitals use these for cleaning tools. Over time, these things can make the tubing weak. If the tubing gets hot or meets chemicals a lot, it can change color, get hard, or feel different. Staff can see these problems if the tubing looks cloudy, sticky, or breaks easily. Checking the tubing often helps stop these problems before they get worse.
Manufacturing defects (uneven shrinking, air bubbles)
Problems during making can also cause PET heat shrink to fail. If heating is not done right, the tubing can shrink unevenly. This makes the tubing not work as it should. Air bubbles can form if the tubing is not heated evenly. These bubbles make gaps and make the tubing less useful. If the tubing is not lined up right, it may not cover the tool well or shrink evenly. This can make the tool not work right.
Defect Type | Description |
|---|---|
Uneven Shrinkage | Happens when heating is not done right, making the tubing not work well. |
Air Bubbles | Happen from uneven heating, causing gaps and making the tubing weaker. |
Misalignment | Makes the tubing not cover the tool right or shrink evenly, which can hurt how the tool works. |
Note: Finding these problems early helps keep tools working well and lowers the risk of common failures.
Prevention and management strategies
Inspection and maintenance tips
Checking PET heat shrink often keeps it working well. Staff should look for cracks, burns, or bubbles after each cleaning. They need to check if the surface is smooth and fits tightly. Good PET heat shrink tubing lowers the chance of problems. Heating the tubing evenly stops bubbles and folds. Tubing that resists chemicals stays strong after cleaning. Testing dielectric strength before using helps stop insulation problems. Staff should let the tubing cool before they check for any problems.
Pick good PET heat shrink tubing.
Heat the tubing evenly to stop bubbles or folds.
Use tubing that does not get hurt by chemicals.
Test dielectric strength before using the tool.
Check for smooth coverage and a tight fit.
Let the tubing cool before checking it.
Heating tools should be checked often to make sure they work. Staff need to look at sealing jaws and crimpers for damage. Cleaning the sealing parts often stops dirt from building up. Using good parts helps heat move better and last longer.
Best practices for application and storage
Putting on and storing PET heat shrink the right way keeps it strong. Staff should keep shrink film between 30 and 77 degrees Fahrenheit. In summer, they should store materials in cool places away from sun and busy doors. Getting deliveries early helps avoid heat during shipping. In winter, staff should keep rolls safe from big temperature changes and wetness. They should store rolls away from doors and keep them dry.
Store shrink film at 30–77°F.
Keep materials cool and out of the sun.
Get deliveries early.
Stop temperature changes and wetness in winter.
Staff training and quality control
Training helps staff find problems early. They learn how to put on PET heat shrink the right way. Quality checks make sure every tool is safe. Staff should always follow cleaning and checking steps. They should tell someone right away if they see damage or changes. Learning new things helps everyone know the best ways to work.
Tip: Training often and having clear rules helps stop tool problems and keeps patients safe.
PET heat shrink failures can make surgical tools less safe. They can also make the tools not work as well. Staff need to check the tools often. They should be careful when they use them. It is important to follow all training steps. Using good materials helps lower risks. Storing materials the right way is also important. Teams must tell someone if they see damage or changes. Watching for problems helps keep patients safe. It also helps tools last longer.
Tip: Checking tools often and fixing problems quickly stops bigger issues.
FAQ
What is PET heat shrink used for in surgery tools?
PET heat shrink covers parts of surgery tools. It gives insulation and protection. It helps keep tools safe for patients and staff.
How often should staff check PET heat shrink?
Staff should check PET heat shrink after every cleaning and before each use. Regular checks help find problems early.
What signs show PET heat shrink is failing?
Common signs include cracks, peeling, bubbles, or changes in color. The tubing may feel rough or loose.
Can staff fix damaged PET heat shrink?
Staff should not try to fix damaged PET heat shrink. They must replace it with new tubing to keep tools safe.
Why does PET heat shrink sometimes peel at the edges?
Peeling at the edges can happen from rough handling, poor cutting, or repeated rubbing. Staff should handle tools gently and check edges often.
See Also
FEP Versus Polyolefin Heat Shrink Tubing in Surgery Tools
Key Uses of Ultrathin PET Heat Shrink Tubing in Medicine
The Importance of Ultra-Thin PET Heat Shrink Tubing in Healthcare
New Developments in FEP Heat Shrink Tubing for Healthcare
Essential Insights on PET Heat Shrink Tubing for Electronics

© Copyright 2024 My First Blog - All Rights Reserved.